I’ve gutted and rebuilt four bathrooms in my own houses. The first one I made every mistake on this list. The fourth one I caught them all before they happened.
The thing about bathroom remodels is that they go over budget more often, and by larger amounts, than almost any other room in a house. It’s almost never the tile. It’s almost never the fixtures. It’s four specific mistakes that happen at the rough-in stage — the part where the walls are open and the plumbing is being set — and each one costs about $5,000 to fix once the tile is up.
The good news: every one of these mistakes is preventable if you know to look for them. The bad news: most general contractors and a lot of plumbers won’t catch them on their own, because they’re not the ones living in the bathroom afterward.
Here’s the list, in the order they show up on a real job.
Mistake 1: Tiling before plumbing rough-in is set to final height
Every dimension in a bathroom rough-in depends on the final finished surfaces — not the existing ones, and not what’s there when the plumber shows up.
The drain in the shower has to land at the elevation that puts the strainer flush with the finished tile. The supply valves coming through the wall have to stick out exactly far enough that the trim plates sit flush against the finished tile surface — not the cement board, not the subfloor, the tile itself. The toilet flange has to be at the right elevation for the new flooring. The faucet supply lines have to be at the right height for the new vanity.
If any one of those dimensions is set off the existing surfaces, you’ve got a problem the moment you finish tiling. And the “fix” once the tile is up is to open the tile, redo the rough-in, and re-tile. That’s the $5,000.
The right sequence:
- Determine the final finished floor height: subfloor + underlayment + mortar bed + tile thickness. Write it down.
- Determine the final finished wall height: studs + cement board + waterproofing + thin-set + tile thickness. Write it down.
- Set every plumbing rough-in to those numbers, not to the existing surfaces.
- Confirm with the plumber in writing before they leave the rough-in inspection.
This isn’t a mistake — it’s a sequence error. The fix isn’t to be a better tile-setter. It’s to be a better project manager.
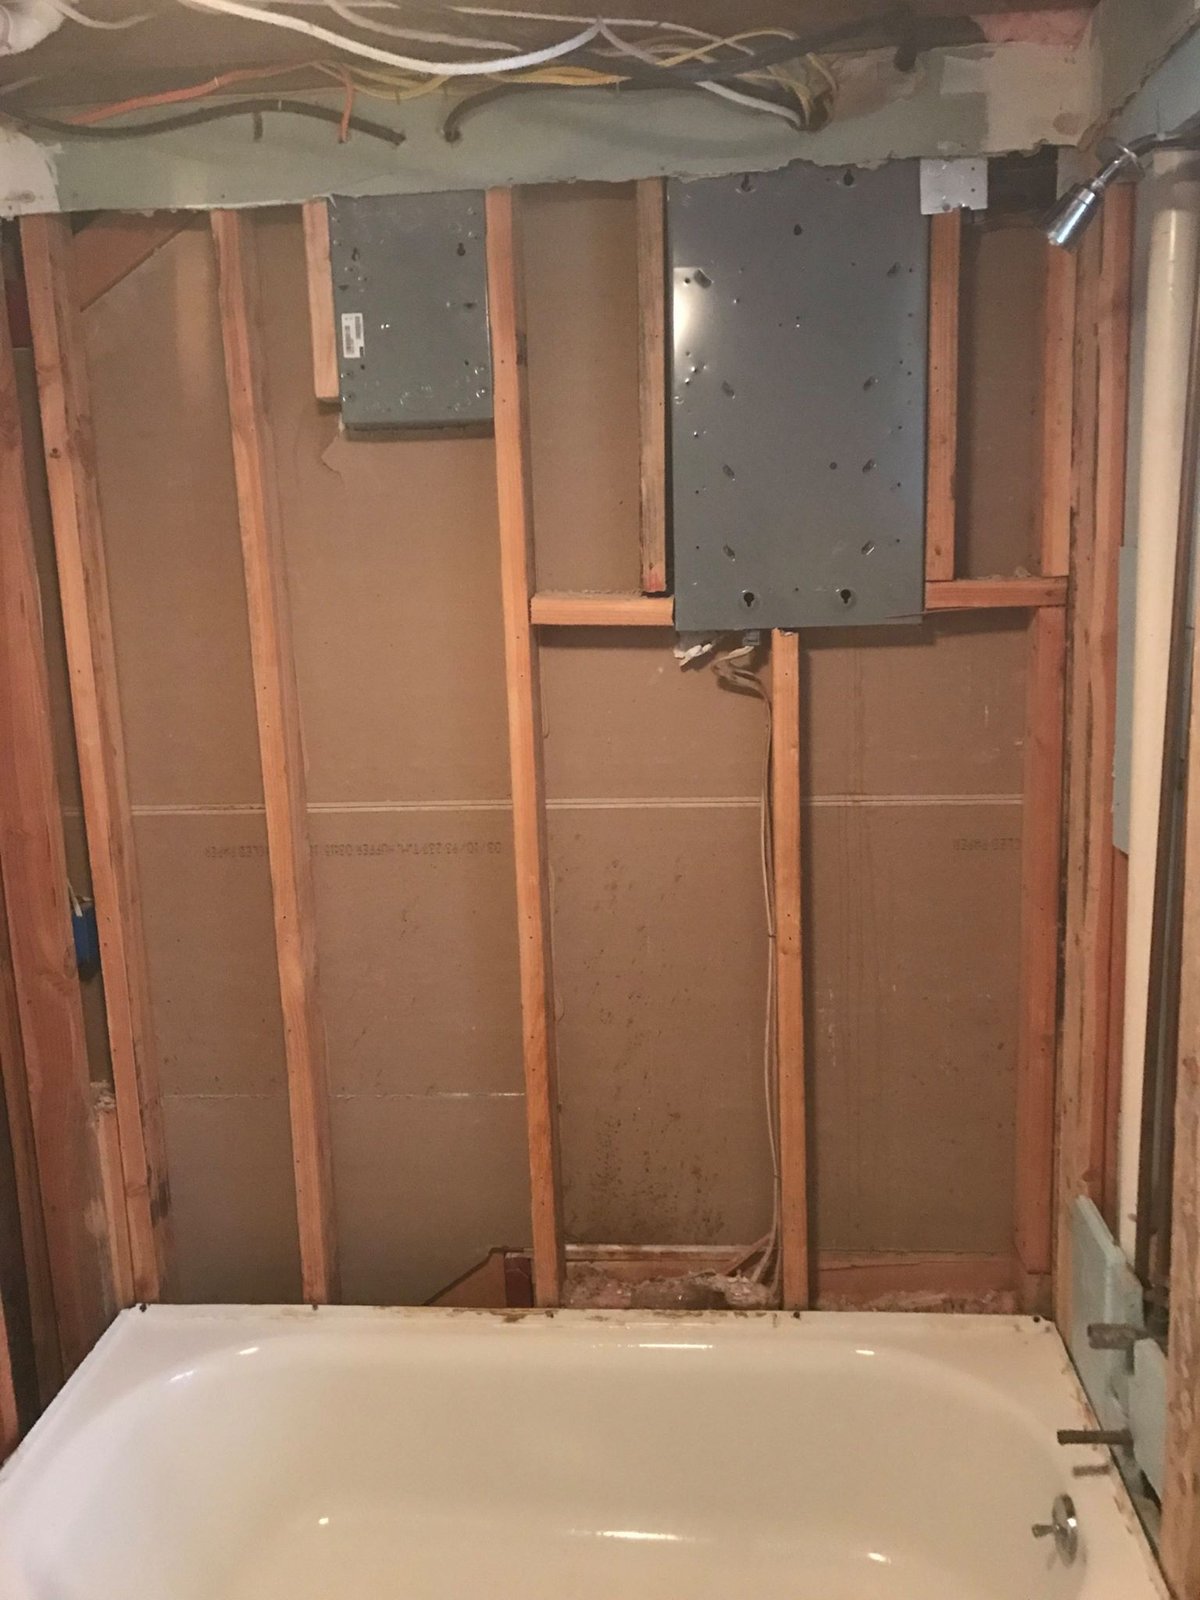
Mistake 2: Greenboard (or regular drywall) behind tile in a wet zone
Greenboard is paper-faced gypsum drywall with a moisture-resistant coating. It looks green. It is slightly more water-resistant than regular drywall. It is not a tile substrate, despite the fact that it’s been used as one for the last forty years.
The problem with greenboard behind tile in a shower: the paper face still absorbs moisture, the gypsum core still dissolves over time, and the tile loses its bond as the substrate degrades. The failure mode is gradual — tile starts cracking at the grout lines, then individual tiles pop loose, then you peel back one tile and find black mold behind it. Typically 7-10 years.
The correct material behind shower tile is cement board: Durock, Wonderboard, or HardieBacker. Plus a waterproof membrane (RedGard, Schluter Kerdi, or equivalent) on top of that before the thin-set. The cement board provides the rigid substrate. The membrane provides the moisture barrier. Together they last 30+ years.
How to spot this in a contractor’s plan: ask what’s going behind the tile in the wet zone. If the answer is “greenboard” or “moisture-resistant drywall” — that’s the wrong answer. The right answer is “cement board with a waterproof membrane.”
If you’re tearing out an existing bathroom and you find greenboard behind the tile in the shower, congratulations — you found the source of the problem you didn’t know you had.
Mistake 3: No slope, or wrong slope, on the shower pan
The shower pan — the floor of the shower, before tile — has to slope toward the drain at a code-required minimum of 1/4 inch per foot. That’s not optional, and it’s not a “build it level and the membrane will figure it out” situation. The slope is what physically moves water off the floor and into the drain.
The mistake: building a flat shower pan, or one with insufficient slope, or one with slope that runs the wrong direction. Water sits on the pan, finds the path of least resistance — which is usually whatever microscopic gap exists in the tile grout or at the threshold — and ends up either inside the wall cavity, under the floor, or migrating to the ceiling below.
The right sequence (for a traditional mortar pan):
- Build a pre-slope mortar bed — a layer of mortar over the subfloor, sloped at 1/4” per foot toward the drain.
- Install the waterproof membrane (PVC, CPE, or sheet membrane) on top of the pre-slope, with the drain weep holes uncovered.
- Build the final mortar bed on top of the membrane, also at 1/4” per foot slope.
- Set the tile on the final mortar bed.
You can also use a pre-fabricated pan system (Schluter, Kerdi, Wedi) where the slope is built into the manufactured panel. Either approach works. Skipping the slope entirely is the failure mode.
How to verify: before tile goes up, put a four-foot level across the shower pan with one end at the drain. The opposite end should be one inch higher (1/4” per foot × 4 feet = 1”). If it’s not, the slope is wrong.
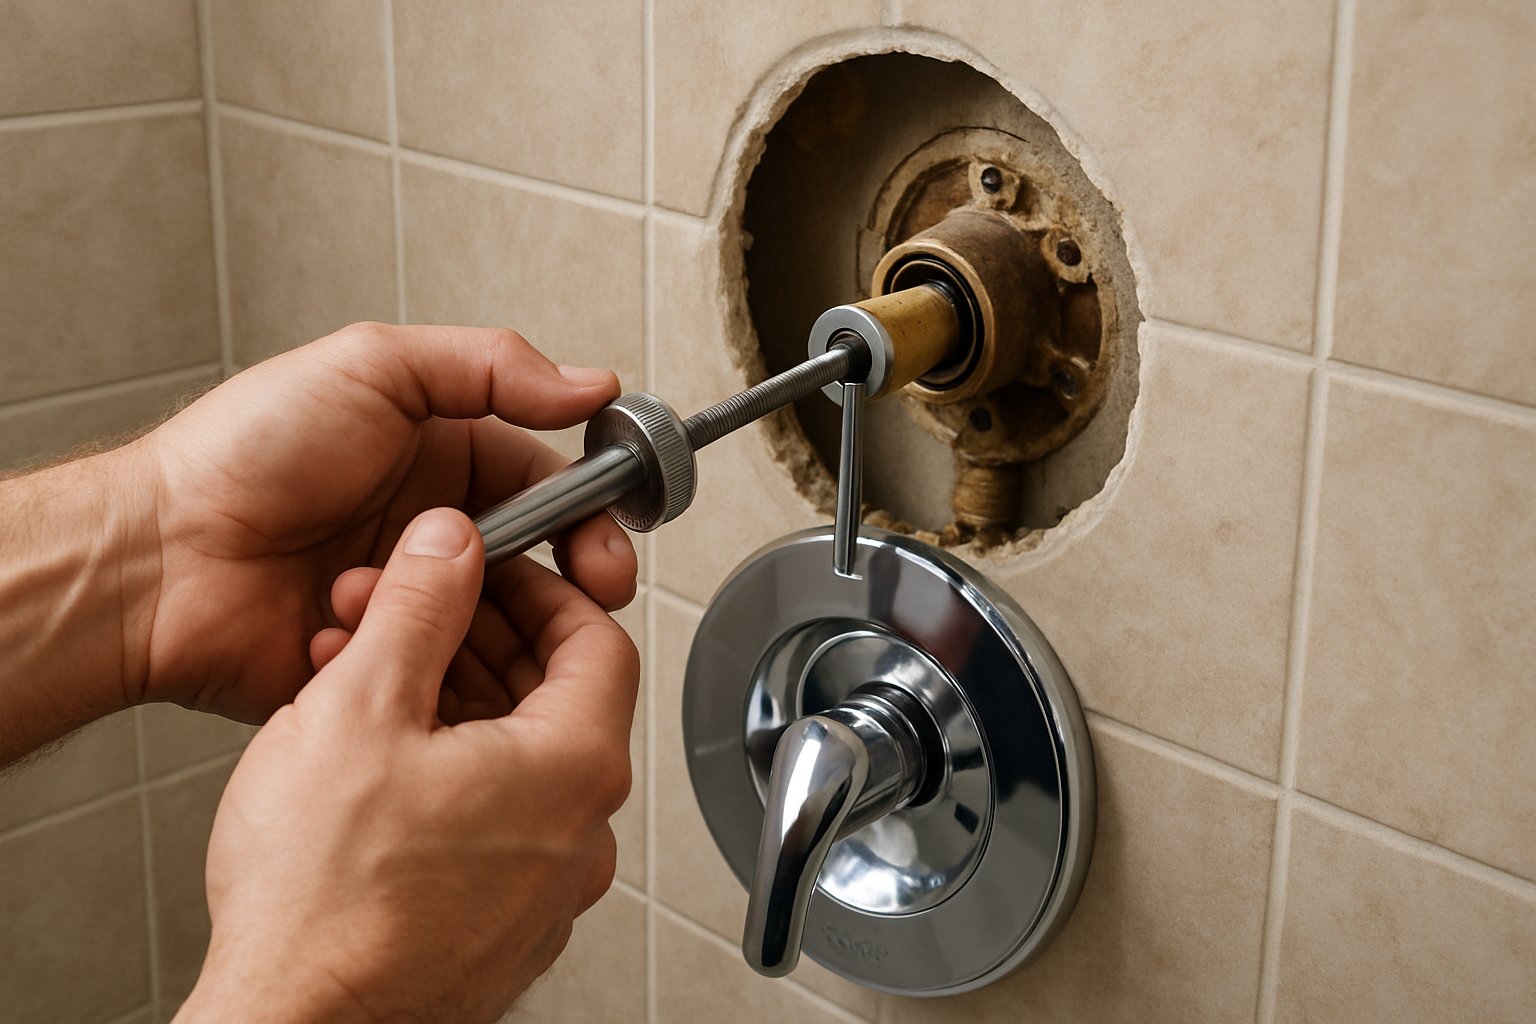
Mistake 4: Buying a cheap rough-in valve
This is the most expensive mistake on the list because it’s the one that gets you years after the project is done.
The rough-in valve is the part inside the wall that controls hot water, cold water, and the diverter (shower vs. tub). It’s the part you can’t see and can’t change later without opening the wall. The trim — the handle and escutcheon you see in the shower — is just decoration over the valve.
A builder-grade rough-in valve costs $50-$80 and uses a cheap plastic or thin-brass cartridge that will fail in 3-7 years. A real rough-in valve from Delta, Moen, Kohler, or Grohe costs $200-$350 and uses a brass or ceramic-disc cartridge that lasts 20+ years.
When the cheap valve fails — and it will — you’re not just replacing a cartridge. The cartridge is sized differently for the cheap valve, so the only universal “fix” is to open the wall, replace the entire valve body, and re-tile. That’s the same $5,000 wall opening that you paid for once already.
Spending the extra $200 at rough-in is the single highest-leverage decision in a bathroom remodel.
How to spec it: ask the plumber to use a Delta MultiChoice, Moen Posi-Temp, or Kohler Rite-Temp valve body — these are the major-brand standards with 20+ year cartridges. Pay the upcharge. Make the trim choice later.
How to apply this list to your project
If you’re planning a bathroom remodel, work through the list before you sign with anyone:
- Sequence question: Ask the contractor how they’re setting rough-in dimensions. The right answer references the final finished surfaces, not the existing ones.
- Substrate question: What’s going behind the tile in the wet zone? Right answer is cement board + waterproof membrane.
- Pan question: What’s the slope on the shower pan? Right answer is 1/4 inch per foot, with a pre-slope and a final slope.
- Valve question: What rough-in valve are you using? Right answer is a major-brand cartridge valve, not a builder-grade special.
If any of those questions get vague or hand-wavy answers, that’s a flag. None of these are obscure issues — they’re four of the most basic rough-in decisions in a bathroom remodel, and the right answers should come back fast.
Want me to look at your bathroom?
The fastest way to spot which of these four mistakes are about to happen on your project: send me three photos for a $9.99 diagnostic report — the existing bathroom layout, the rough plumbing if you can see it, and any wall you’re planning to keep.
I’ll tell you which of the four are likely to bite, what to ask the contractor before signing, and where I’d push back on the scope.
You can also see bathroom projects I’ve worked on — gut-and-rebuild from rough-in through finish — for a sense of what each stage actually looks like.
The cheap version of a bathroom remodel is the one done right the first time. The expensive version is the one done twice.