The Department of Energy estimates that a typical pre-2000 home has roughly half the attic insulation it should. The cost to add insulation is low. The labor — for blown-in cellulose — is one weekend with rental equipment. The annual heating-and-cooling savings are typically $200–$500 in colder climates. The payback period is usually under three years.
This is one of the highest-ROI projects a homeowner can do. It’s also one of the few major HVAC-adjacent improvements that’s genuinely a DIY job rather than a “you really need a contractor” job.
Here’s the full process, including the prep that makes the difference between a real upgrade and a waste of money.
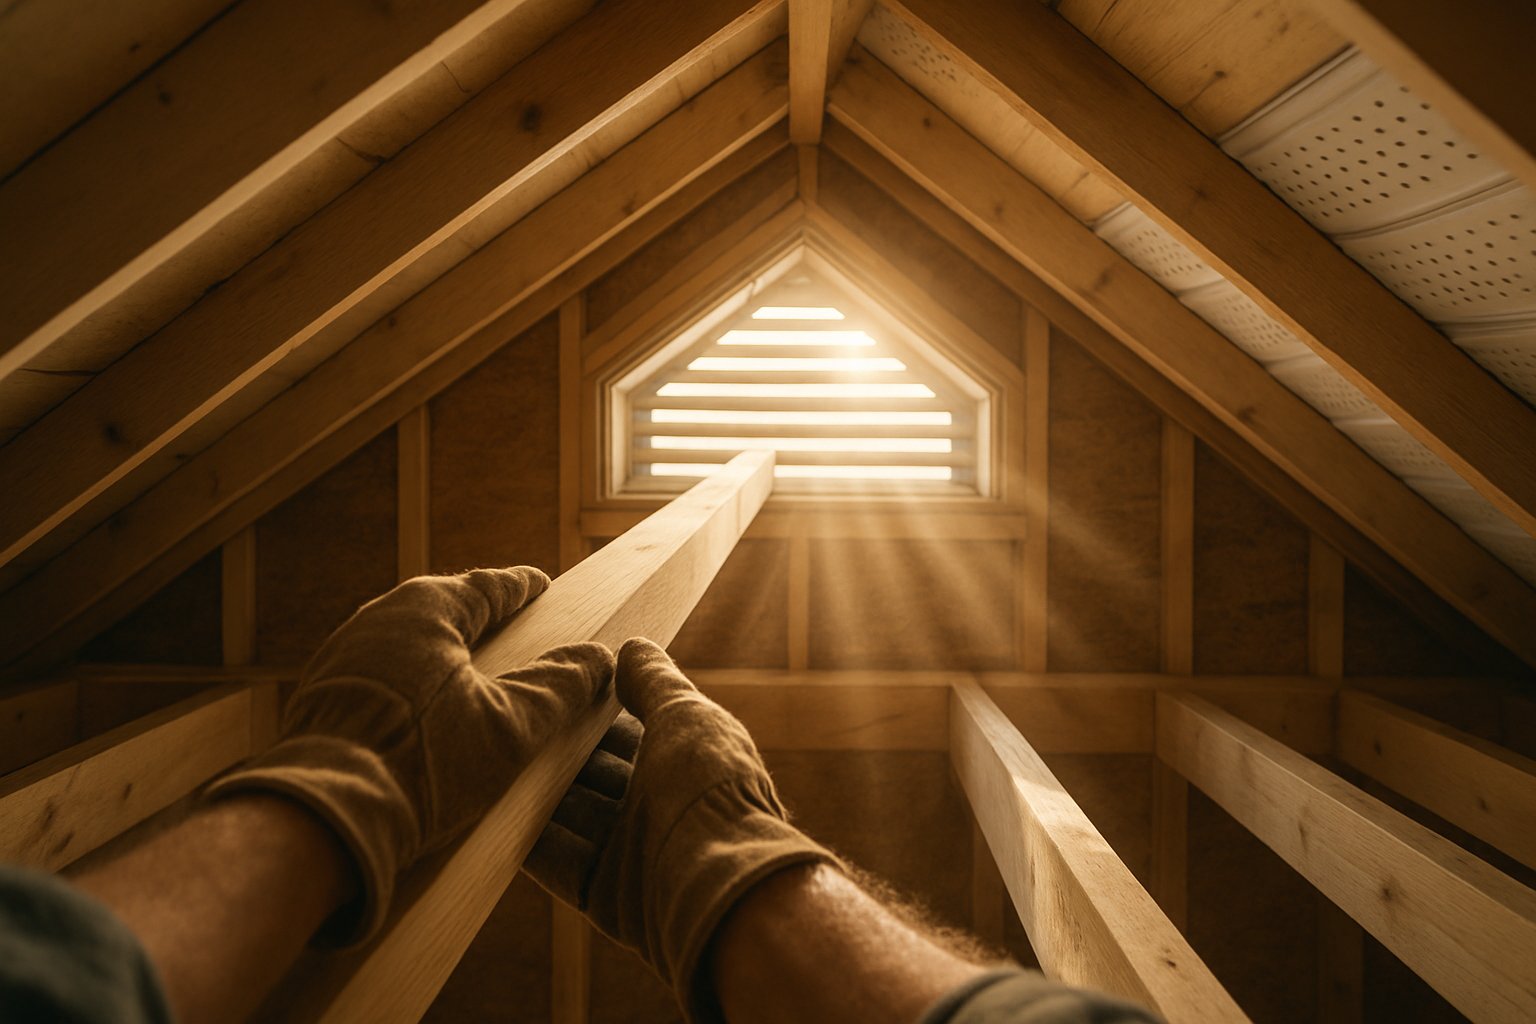
Step 1: Find Out What You Have
Climb into the attic with a tape measure. The depth of the existing insulation, plus what type, tells you everything you need to plan the upgrade.
Measuring depth: Push the tape measure down into the insulation until it touches the ceiling drywall (or the top of the joists, whichever is lower). The number is your existing R-value’s starting point.
Identifying the type:
- Loose, fluffy gray-white blanket spread evenly between joists = blown-in cellulose
- Loose pink, yellow, or white fluffy material = blown-in fiberglass
- Pre-cut blanket strips, paper-faced or unfaced = batt insulation
- Thick, solid yellow foam = closed-cell spray foam (rare in older homes)
- Loose gray gravelly stuff with sparkles = vermiculite. STOP. This may contain asbestos. Do not disturb. Get it tested before you do anything else.
Rough R-value per inch:
- Cellulose: R-3.2 per inch
- Fiberglass blown: R-2.5 per inch
- Fiberglass batt: R-3.1 per inch
- Spray foam (closed cell): R-6 per inch
So 6 inches of blown cellulose = roughly R-19. The current Energy Star recommendation for most of the US is R-49 to R-60 (about 13–18 inches of blown insulation). Most older houses have R-19 to R-30. There’s room to add a lot.
Step 2: Air-Seal Before You Insulate
The single most common mistake DIYers make: dumping more insulation on top of unsealed air leaks. Insulation slows heat transfer through solid surfaces. It does nothing for air leaks. If you have unsealed gaps, hot/cold air just blows around the insulation and your savings disappear.
Find and seal these before adding insulation:
- Top plates of interior walls — wherever an interior wall meets the attic, there’s almost always a gap between the drywall and the wood top plate. Seal with caulk or expanding foam (use the can-marked “fire block” foam if it’s near anything heat-producing).
- Recessed light cans that aren’t IC-rated — older recessed lights can’t be insulated over (fire hazard). Replace them with IC-rated airtight cans, or build airtight covers around them ($10 cans at any hardware store).
- Around HVAC vent boots that pass through the ceiling drywall.
- Around plumbing vent stacks and electrical wires passing through the top plates.
- Around the attic access hatch — the hatch itself usually has zero insulation and a 1/4-inch gap around the perimeter. Seal the gap with foam weatherstripping; insulate the back of the hatch with rigid foam board glued on.
- Bathroom exhaust fan housings — often have gaps where the housing meets the drywall.
- The chimney chase (where a metal chimney passes through the attic) — needs metal flashing per code, not foam. Use high-temp silicone if there are small gaps.
This step takes a half-day. It’s the most important half-day of the project. Insulation without air-sealing is roughly 50% effective; insulation with air-sealing is 95% effective. Same materials, double the result.
Step 3: Install Eave Baffles (Maintain Airflow)
Attic insulation can’t block the airflow path from the soffit vents under the eaves up to the ridge vent at the peak. If it does, your roof gets too hot in summer and develops moisture problems in winter.
The fix: rigid foam or cardboard “baffles” stapled into each rafter bay near the eave. These create a permanent air channel between the insulation and the roof deck.
- Buy foam baffles (usually 22.5 inches wide to fit between standard 24” on-center rafters; 14.5” for 16” on-center). Sold in bundles at any home center.
- From the attic, identify each rafter bay where insulation will be added.
- Slide a baffle up against the underside of the roof deck near the soffit, with the lower end positioned so insulation underneath it won’t block the soffit vent below.
- Staple it to the rafters on both sides. Should sit firmly with no flex.
- Repeat for every rafter bay around the perimeter.
A baffle every bay is the goal. Old houses sometimes only have soffit vents on two sides — only baffle the bays with active vents below.
Step 4: Pick the Right Insulation
Two main DIY-friendly options:
Blown-in cellulose ($0.45-$0.65 per square foot installed): Best DIY value. Fills around joists, wires, and pipes naturally. Rent the blower for free at most home centers when you buy 10+ bags. Effective and quick. Downside: dusty work; need a partner.
Fiberglass batt ($0.55-$0.85 per square foot): Easier solo project; no rental equipment. Just unroll between joists. Downside: leaves gaps around obstructions; less effective per inch; itchy if you don’t suit up.
For topping off existing insulation: blown cellulose is dramatically better. It conforms to whatever’s already there. Batts laid on top of existing batts always leave air gaps that kill performance.
For an attic with no existing insulation: either works. Blown cellulose is faster and cheaper for areas over ~500 sq ft.
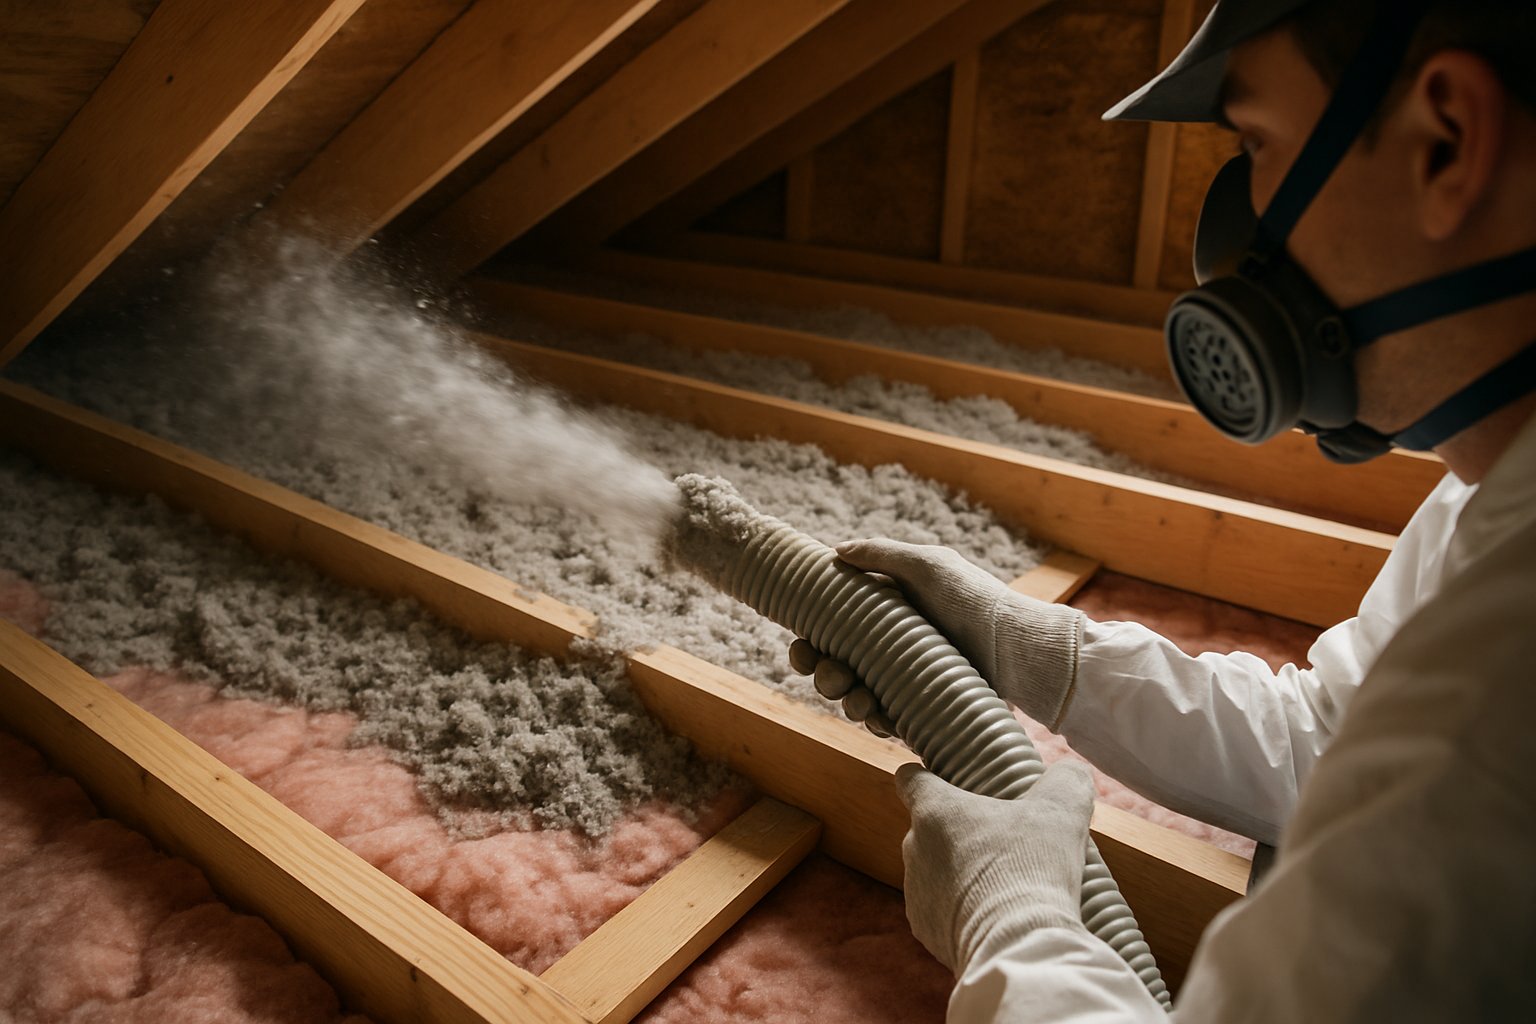
Step 5: Install (Blown-In Cellulose Method)
Two-person job. One person up in the attic with the blower hose, one person at the bagging machine on the ground floor (usually in the garage or driveway).
- Set up the blower outside or in the garage near the attic access.
- Run the long flexible hose from the blower up through the attic access.
- Top off bags of cellulose into the blower hopper as needed.
- The attic person directs the hose like a flexible fire hose, blowing insulation across the entire attic floor in even passes.
- Aim for the target depth — write it on a stake driven into a joist as a reference. For R-49, you want about 14 inches of blown cellulose. For R-60, about 18 inches.
- Don’t blow over the perimeter where baffles are installed — blow up to the bottom edge of the baffle, then stop.
- Don’t bury soffit vents.
- Don’t cover the attic access hatch — leave a 2-inch border so the hatch can still close.
- Once finished, walk the perimeter from inside the attic and verify that no soffit vents are buried. Fix any spots where insulation has drifted.
A 1500 sq ft attic typically takes 4–6 hours with two people, including setup and cleanup. Cost in materials: $400–$600.
Common Mistakes
- Skipping the air-sealing step. Most expensive shortcut on the list. You’ll get half the value of the insulation.
- Burying recessed lights that aren’t IC-rated. Fire hazard. Replace them or build covers first.
- Blocking soffit vents. Causes moisture problems and shortens roof life dramatically.
- Adding insulation on top of vermiculite without testing. Vermiculite from before 1990 may contain asbestos. Disturbing it without testing risks releasing fibers — and burying it makes future remediation much more expensive.
- Using fiberglass batts on top of existing blown cellulose. Batts compress the cellulose and leave air gaps. Wastes both materials. Always blown-on-blown or batt-on-batt; never mix on the same surface.
- Leaving the attic access hatch un-insulated. A 30-by-22-inch uninsulated hatch is the equivalent of a 6-by-6-inch hole in the attic insulation R-wise. Always insulate the back of the hatch with rigid foam.
When to Hire It Out
- Vermiculite present. Get it tested. If asbestos, hire abatement; do not DIY.
- Knob-and-tube wiring in the attic. Code prohibits insulation on top of K&T. Replace the wiring or hire a pro who can install rigid box covers around it before insulating.
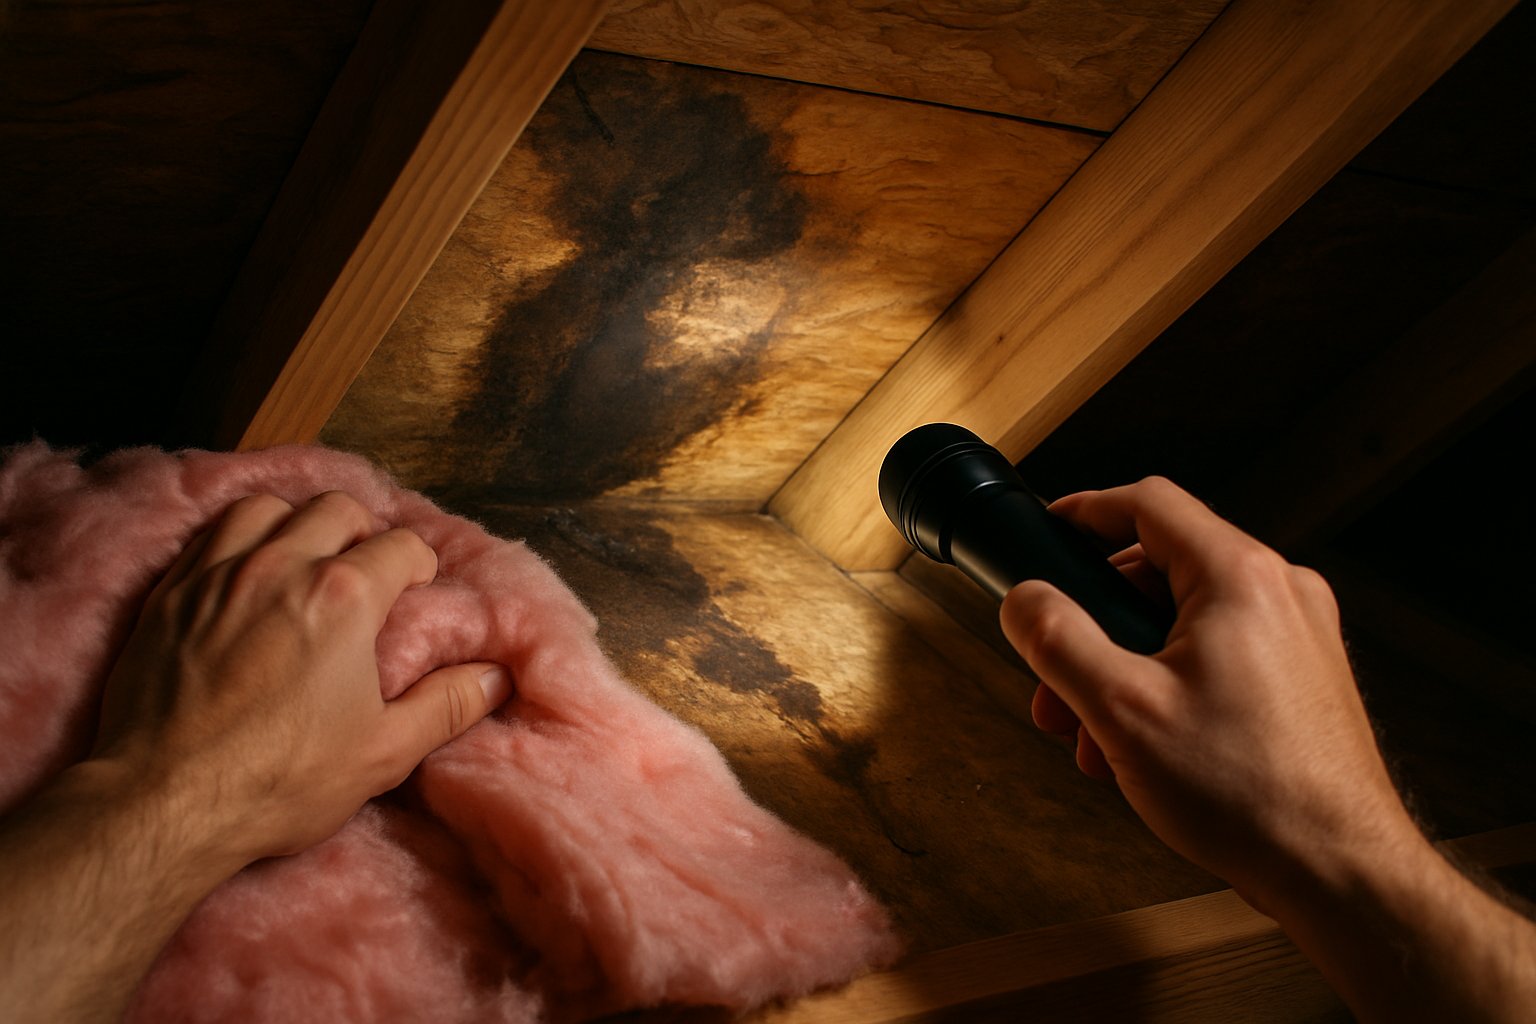
- Existing insulation has rodent damage, mold, or moisture issues. Don’t bury the problem. Have it removed and the source addressed first.
- Spray foam is the desired product. Spray foam requires specialized equipment and chemical handling — never DIY this.
- The attic has so little headroom that you can’t safely move around in it. Pros use special equipment for low-clearance attics.
Frequently Asked Questions
Will adding insulation pay for itself? How fast? Yes, in most US climates. Typical payback is 2–4 years for a topping-off project. Once paid back, it’s pure annual savings for the life of the house.
Can I get a tax credit or rebate? The federal Energy Efficient Home Improvement Credit covers 30% of insulation costs up to $1,200/year. Most utilities also offer rebates of $0.50–$1.00 per square foot. Check your state and utility programs before you buy materials.
How much insulation is too much? At R-60 you’re at the point of diminishing returns — additional inches barely move the needle on heating cost. Most building codes recommend R-49 minimum; R-60 is the upper bound for cost-effectiveness.
My attic doesn’t have a ridge vent. Should I add one? If you have soffit vents but no ridge vent, you’re missing the exhaust side of the convection loop. Adding a ridge vent dramatically improves attic air movement. It’s a roofer job but typically under $500 on most houses.
What about radiant barrier? Radiant barriers (the foil-faced sheets) help most in hot climates with cooling-dominated bills. In northern climates, the value is marginal. Cellulose insulation is a better dollar-for-dollar investment in cold-winter areas.
The Bottom Line
A weekend, one rental blower, $400–$600 in materials, and you’ve made the highest-ROI energy improvement available to a typical US home. The trick is the prep — air-seal first, install baffles, then blow. Skipping any of those reduces the result by half or more.
If you’re not sure where your house stands or want a plan that includes your specific climate zone, building age, and current setup, send your photos for a $9.99 diagnostic report.