About 15,000 house fires per year in the US start in clothes-dryer vents. The cause is almost always the same: lint accumulates inside the duct between the dryer and the outside vent, the dryer runs hot trying to push air through the partially blocked duct, and eventually the lint catches.
The lint trap inside the dryer catches maybe 60% of the lint the cycle produces. The rest goes into the duct. After a year or two of laundry — depending on how long your duct run is and how often you dry — the duct can be half-blocked.
Cleaning the duct takes 30 minutes once or twice a year. It’s the single highest-leverage fire-prevention task in any house.
Here’s how to do it right.
Signs Your Vent Is Already Clogged
Any of these means it’s time:
- Clothes take noticeably longer to dry than they used to. Two cycles where one used to do it.
- The dryer cabinet feels hot to the touch during a cycle. A working dryer’s exterior should feel warm, not hot.
- The laundry room smells musty or “burnt-sweet” when the dryer is running. That’s the smell of overheated lint.
- The exterior vent flap is barely moving when the dryer is running. Should be visibly fluttering with strong airflow.
- It’s been more than a year since the last cleaning, regardless of symptoms.
Tools and Materials
- A dryer vent cleaning brush kit (Gardus LintEater is the standard — about $35 on Amazon or any home improvement store). Comes with flexible rods that screw together to extend the brush 12 to 24 feet.
- A shop vacuum (a regular vacuum will work but the bag fills fast)
- A flashlight or headlamp
- A drop cloth or large flat-rate cardboard box
- A dust mask (lint blown back out of the duct gets in your eyes and lungs)
- Optional: a cordless drill (to spin the brush as it goes through the duct, more effective than pushing alone)
Step 1: Unplug, Disconnect, and Move the Dryer
- Unplug the dryer from the wall outlet. If it’s gas, also turn off the gas shutoff valve behind it.
- Loosen the clamp where the flexible duct connects to the back of the dryer, and pull the duct off the dryer’s exhaust port.
- Loosen the clamp where the duct connects to the wall fitting and pull the duct off there too.
- Slide the dryer forward enough to access both the back of the dryer and the wall connection. (For gas dryers, be careful with the gas line — slide gently and don’t strain the connection.)
- Lay the disconnected flexible duct on the drop cloth.
Step 2: Clean the Duct From Both Ends
The duct between your dryer and the outside vent is what we’re after. Most are 5 to 25 feet long depending on whether your dryer is on an outside wall.
From inside (wall opening):
- Assemble enough brush rods to extend the full length of the duct.
- Insert the brush head into the wall fitting where the dryer connects.
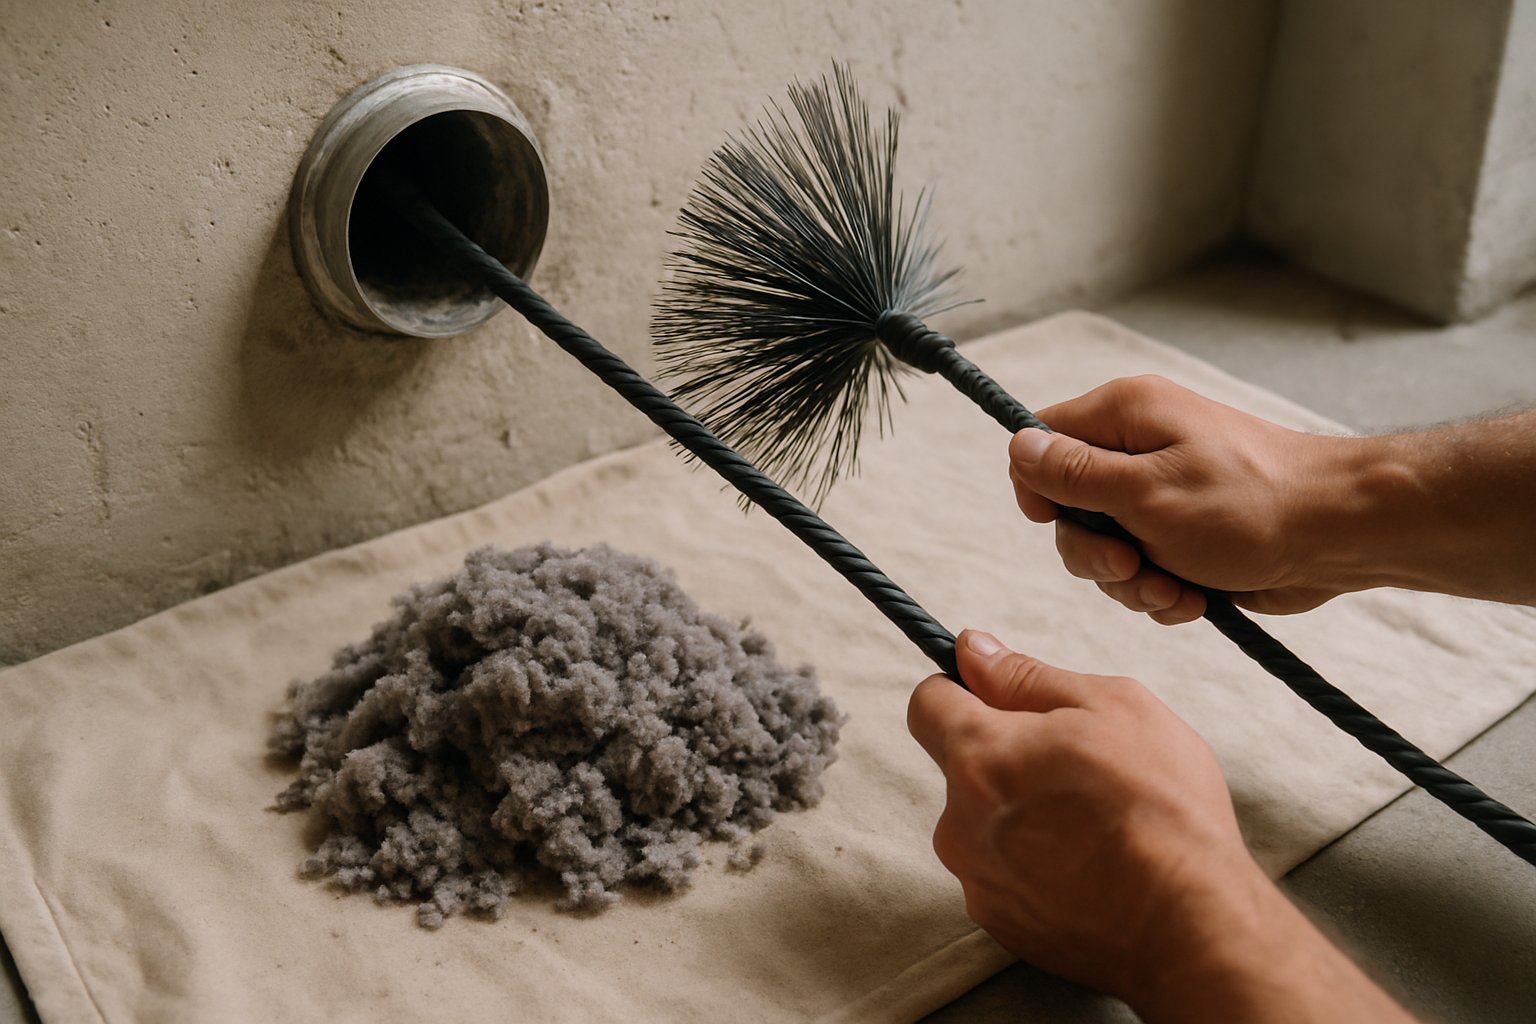
- Push the brush in 6 to 12 inches at a time, then pull it back. Lint comes out in clumps with each pull.
- If you have a drill, attach the drill to the rod’s end and spin slowly while you push. Spin with the drill, push by hand. Don’t use the drill at full speed.
- Continue extending the brush further into the duct until you’ve pushed all the way through to the outside.
- As you pull lint out, vacuum it up immediately so it doesn’t get back into the duct.
From outside (the vent hood):
- Go outside and find the vent hood (usually a louvered flap on an exterior wall, sometimes on the roof).
- Lift the flap and inspect — there’s usually a wad of compacted lint right inside the hood.
- Pull out as much as you can by hand, then run the brush from this side too. Pulling clean lint out the way it was meant to go is the most effective direction.
- If the vent hood is high on the wall or on the roof, this is where many homeowners stop and call a professional duct cleaner. Don’t take risks on a ladder for this.
A note on duct material: If your duct is the old white plastic flexible tubing or the foil “slinky” tubing, replace it with rigid metal duct or aluminum semi-rigid duct while you have it disconnected. The plastic and foil ducts are fire hazards and not code-compliant in most municipalities (and have been for years). They snag lint and they melt. The metal duct is $10 for an 8-foot section.
Step 3: Clean the Inside of the Dryer Itself
While the dryer is pulled out and disconnected:
- Unscrew the lint trap housing inside the dryer (most have two screws holding it). Pull it out and shop-vac the cavity behind it — this is the part the lint trap doesn’t catch.
- With the lint trap removed, you can see further down into the dryer’s blower fan area. Vacuum what you can reach.
- Pull the lint screen all the way out and wash it with warm soapy water and a soft brush. Dryer sheets leave a film on the screen that blocks airflow even when no lint is visible. Hold the screen up to a light — water should drip through, not bead up. If it beads, scrub more.
- Let the screen dry completely before re-installing.
Step 4: Reconnect and Test
- Reattach the lint trap, the flexible duct to the dryer, the flexible duct to the wall, and tighten the clamps.
- If the duct itself looked compressed, kinked, or torn, replace it with new rigid or semi-rigid metal duct. Aluminum tape (NOT cloth duct tape) seals the joints. Cloth duct tape will dry out and fail.
- Slide the dryer back into place. Don’t crush the duct — leave a few inches of breathing room.
- Plug in (and turn the gas back on, for gas dryers).
- Run the dryer empty for 5 minutes on the air-fluff or no-heat setting, and check the exterior vent. The flap should be fluttering hard with airflow.
Common Mistakes
- Only cleaning the lint trap and skipping the duct. The lint trap catches the easy 60%; the duct is where the danger is.
- Using the dryer’s vinyl/plastic flexible duct. That stuff is a fire hazard. Replace with metal.
- Crushing the duct behind the dryer. When you slide the dryer back, leave a few inches between the dryer and the wall — and use elbows on the duct, not sharp 90-degree bends, which restrict airflow.
- Cleaning from inside only and ignoring the outside vent. Half the buildup is at the outside hood. Always clean both ends.
- Not replacing the duct after a long time in service. Even a clean metal duct should be replaced every 5–10 years; flexible aluminum gets pinholes and crushed sections that never come out properly.
- Forgetting to clean the dryer’s interior cavity. The space behind the lint trap and around the blower fan accumulates lint that the brush can’t reach from the duct side.
When to Hire It Out
- The duct runs through walls or ceilings to a roof vent and you can’t access the outside end safely. Pro service uses a powerful vacuum from inside while running a brush through, and they can navigate complex duct paths. Costs $80–$150 in most areas.
- You suspect the duct itself is damaged inside the wall. Pros have inspection cameras.
- The dryer is gas and you don’t feel comfortable disconnecting and reconnecting the gas line — call a plumber for that part, then DIY the duct cleaning.
Frequently Asked Questions
How often should I do this? Once a year for a typical household, twice a year if you do laundry daily or have long-haired pets that shed onto clothes. Watch for the warning signs above as your real trigger — they tell you when the duct is actually clogged.
Can I use a leaf blower to clear my dryer vent? Yes, from outside, blowing into the exterior vent toward the dryer. Disconnect the duct from the back of the dryer first (so the lint blows out into a bag instead of into your dryer). It’s effective for short, straight ducts. Less effective for ducts with 90-degree bends.
My duct smells like mold. What does that mean? Either water is getting in from the outside vent (the hood flap might be broken) or your duct has a low spot where condensation collects. The first is a 5-minute fix (replace the vent hood). The second usually needs the duct re-routed.
Should I install one of those magnetic dryer vent indicators? Yes, they’re cheap and useful. They sit in your duct and show airflow with a moving needle — when the needle drops below “good,” it’s time to clean. About $20.
The Bottom Line
A clogged dryer vent is the most common house-fire cause that’s also entirely preventable with 30 minutes of work. Get the brush kit, do it once a year, replace the duct with rigid metal if it’s still the white plastic stuff. The first time you do it, you’ll be horrified by how much lint comes out — and that’s exactly the lint that was about to catch fire.
For the full sequence — including replacing the vent hood, fixing kinked ducts, and re-routing a long run — see Fix a Dryer Vent Fire Hazard.
If you’re doing a laundry-room remodel or moving the dryer to a different wall, send your photos for a $9.99 diagnostic report and we’ll plan the duct route before walls go in.