A dripping outdoor spigot (hose bib) almost always needs a new stem washer (standard style) or cartridge (frost-free style). Both are cheap repairs — $2 to $15 in parts — and take 30 to 60 minutes. The hard part is knowing which type you have, because they’re repaired differently.
Here’s how to identify your spigot, fix the drip, and — for frost-free models — avoid the winter-burst failure that costs thousands.
Standard vs. Frost-Free: Which Do You Have?
Standard (compression) hose bib:
- Short — the valve mechanism is right behind the handle, inside the wall by an inch or two
- Drips stop immediately when you close the handle (no delay)
- Common on homes built before 1985 in cold climates
- Must be shut off from inside the house and drained in winter to prevent freeze-burst
Frost-free sillcock:
- Longer — the valve mechanism is 6–12” inside the house, where it stays above freezing
- When you close the handle, water continues to drain from the spout for a few seconds (the water in the long stem drains out)
- Common on homes built after 1985 and any updated spigot
- Self-draining if installed correctly (slight downward slope to outside)
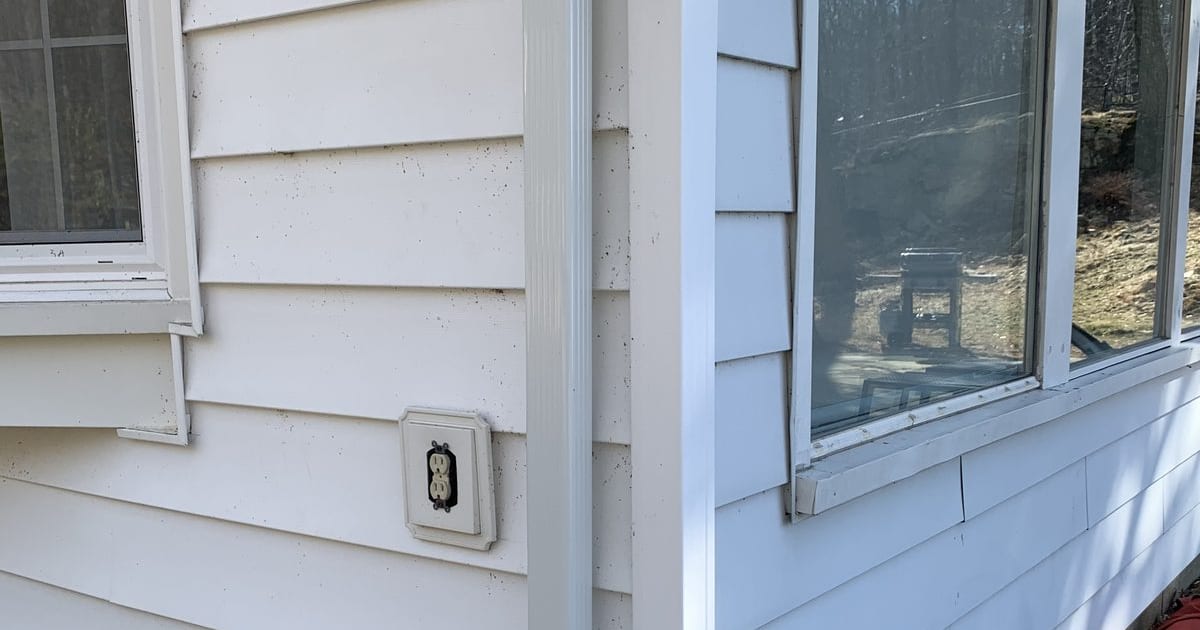
Look at the spigot body. If you can see a long, single, unbroken shaft going into the wall with the handle right at the outside — it’s frost-free. If the handle is attached to a short valve body that’s clearly self-contained — it’s standard.
Fix 1: Standard Hose Bib — Replace the Washer
Tools:
- Adjustable wrench
- Phillips screwdriver
- Washer assortment kit ($3)
Steps:
- Shut off water to the spigot. There should be an interior shutoff on the supply line inside the house (usually in the basement near where the spigot comes through the rim joist). If you don’t have one, shut off the main.
- Open the outside spigot to drain residual water.
- Unscrew the packing nut on the front of the valve body (behind the handle) with a wrench.
- Remove the handle screw, pull the handle off.
- Unthread the stem counterclockwise — it unscrews out of the valve body.
- At the end of the stem you’ll see a rubber washer held on by a small brass screw. Unscrew and replace the washer. Match the shape and size from the kit.
- While you’re in there, replace the packing (the O-ring or stem packing around the upper part of the stem).
- Reassemble in reverse. Hand-tight plus a quarter turn on the packing nut.
- Turn water on and test. No drips from the spout (when closed) or from the packing nut.
Fix 2: Frost-Free Sillcock — Replace the Cartridge or Stem
The frost-free design has the valve mechanism deep inside the wall. The “stem” is the long shaft connecting the handle outside to the valve inside.
Tools:
- Adjustable wrench
- Phillips or Allen screwdriver (brand dependent)
- Replacement stem assembly or cartridge specific to the brand ($10–$25)
Common brands: Woodford, Mansfield, Prier, Zurn, Arrowhead. Identify by the name on the spigot or the pattern of the handle.
Steps:
- Shut off water at the interior shutoff.
- Open the spigot to drain residual water (this takes several seconds — the long stem empties).
- Remove the handle screw and pull off the handle.
- Unscrew the packing nut / bonnet nut behind the handle (may be a hex nut or a round nut).
- Slowly pull the stem straight out. It’s long — 6 to 12 inches. The seat washer is at the far end of the stem (the end that was inside the house).
- Either:
- Replace the washer on the end of the stem (unscrews with a small screw), or
- Replace the entire stem assembly (matched to your brand — cheaper than it sounds; $12 for most models). Replacing the whole stem is better because it also replaces the packing.
- Slide the new stem in — it threads into the valve body deep inside the wall. Hand-tight with the wrench.
- Reinstall the packing nut and handle.
- Turn water on and test.
Fix 3: Drip Is From the Handle/Packing, Not the Spout
If water drips from around the packing nut (behind the handle) rather than out of the spout end, the stem packing or O-ring is the issue — not the washer.
- Shut off water, open the spigot.
- Loosen the packing nut without removing the stem.
- You’ll see rubber packing (O-ring or graphite-style rope packing) compressed in the nut.
- Replace with a matched O-ring from the kit.
- Reassemble, test.
Sometimes tightening the packing nut a quarter turn is enough to stop the leak without replacement — try that first.
The Winter Freeze Failure (Read This)
Frost-free sillcocks are self-draining only if:
- The spigot is sloped slightly downward to the outside (so water drains out after each use)
- You disconnect any hose from the spigot in winter
The #1 cause of frost-free spigot burst: leaving a hose attached through winter. The hose traps water inside the stem. When the trapped water freezes, it bursts the stem deep inside the wall. You won’t know until spring when you turn it on and water floods your basement ceiling.
Every fall:
- Disconnect the hose
- Drain the hose
- If your spigot has an interior shutoff, close it and open the outside spigot so residual water drains
- Leave the outside spigot open all winter if you used the interior shutoff
Common Mistakes
- Not shutting off water first. Turning the stem out under pressure is a spectacular flood, especially for frost-free models with a 10” stem.
- Forcing a seized stem. If the stem won’t unscrew, spray penetrating oil at the packing nut, wait 30 minutes. Forcing it can snap the stem inside the wall — a big repair.
- Wrong washer size. Match the shape and dimensions of the old washer exactly.
- Reusing old packing. Always replace O-rings and packing at the same time as the washer. Old packing leaks even on a new washer.
- Leaving a hose attached in winter. See above — this is the most expensive mistake homeowners make.
When to Replace the Whole Spigot
If the spigot body threads are stripped, the handle stem is broken inside the wall, or the spigot is 40+ years old — replace the entire unit. A replacement costs $25–$60.
This requires:
- Cutting/removing the old spigot from inside the house (soldered copper or threaded connection)
- Installing the new one
- Potentially opening drywall on the inside if there’s no access
Doable DIY for copper solder or PEX crimp. Not recommended for a first-timer plumber job.
Frequently Asked Questions
My frost-free spigot drips for a minute after I close it — is it broken? No. That’s the water draining out of the long stem. Normal. If it continues indefinitely, you have a valve problem.
How often should I replace the washer? Every 5–10 years typically. Budget to do it when you notice the first drip.
Can I convert a standard spigot to frost-free? Yes, but it’s a full replacement — the frost-free has a longer body and must extend back into the heated part of the house. Often requires opening the interior wall for access.
My spigot handle spins freely without doing anything. What’s that? The stem’s threaded connection has worn out, or the handle’s internal coupling has stripped. Replace the stem assembly.
Does the interior shutoff valve count if I already have a frost-free spigot? It’s still a good idea. Even frost-free spigots can freeze if you leave a hose attached or if the drain slope is insufficient. The interior shutoff is your belt-and-suspenders.
The Bottom Line
A dripping outdoor spigot is a small repair — $3 washer or $15 stem assembly, an hour of your time, one wrench. The much bigger issue is winter protection: disconnect hoses every fall, even on frost-free models. That single habit prevents burst pipes and thousand-dollar repairs.
If you’re planning exterior work and want a plumbing plan or winterization checklist for your specific property, send your photos for a $9.99 diagnostic report.