Replacing a sink supply line is a 15-minute job that costs $10 in parts and prevents one of the most expensive failures in a home. Supply lines — especially plastic and older chrome/brass — fail catastrophically without warning, flooding a bathroom or kitchen in minutes. Insurance companies rank failed supply lines as the #1 or #2 source of non-flood water damage claims every year.
If any of your supply lines are over 10 years old or are plastic, replace them now. Here’s exactly how.
What a Supply Line Is
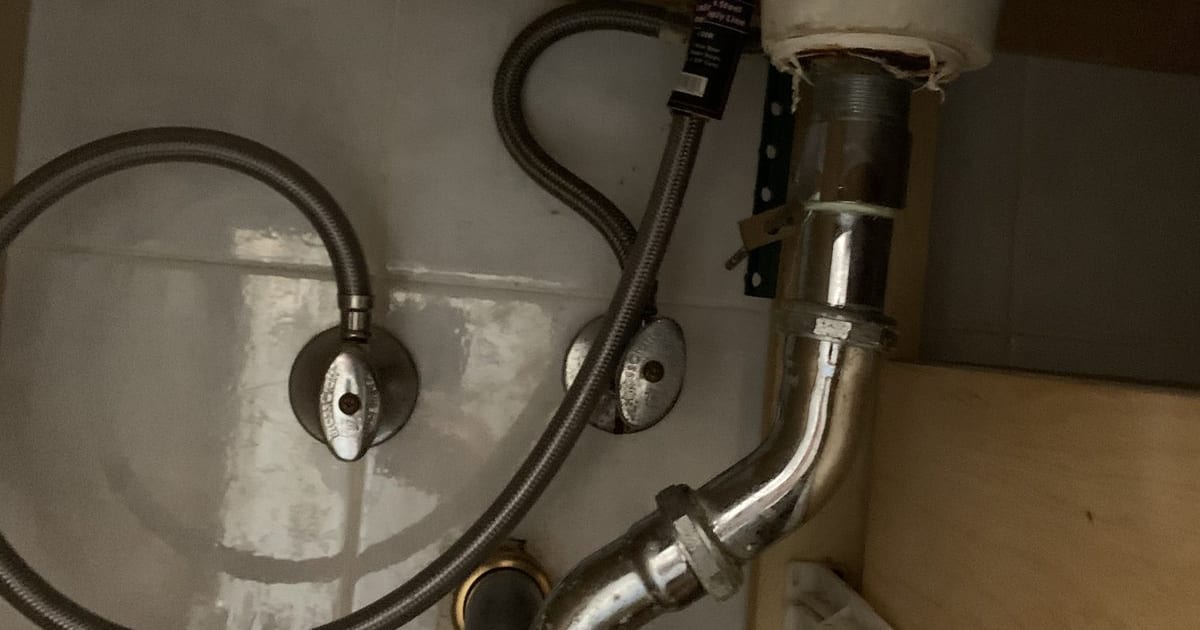
A supply line is the short flexible hose that connects the shutoff valve on the wall (or under the sink) to the faucet or toilet. Every sink has two (hot and cold); every toilet has one (cold only).
Types, in order of reliability:
- Braided stainless steel — Best. 10–20 year life. $5–$8 each. What I install everywhere.
- Reinforced PEX — Good. Often used in new construction.
- Chrome-plated brass (old style) — Moderate. Lasts 10–15 years but fails suddenly.
- Plastic (polymer) — Worst. Many manufacturers now recommend a 5-year replacement cycle. Fails catastrophically. Replace these today.
When to Replace
- Every supply line over 10 years old — regardless of visible condition
- Any plastic supply line at any age — immediate replace
- Any visible corrosion, bulging, or discoloration on a metal line
- Any line that weeps at the connection even after tightening
- Any time you’re replacing a faucet or toilet — never reuse old lines
Measure Before You Buy
Length: Measure from the shutoff valve to the bottom of the faucet or toilet. Buy the next size up from your measurement. Slack is fine; stretched is not.
End fittings:
- Faucet side: Typically 1/2” IPS or 3/8” compression, with a metal nut.
- Toilet side: Typically 7/8” BSP (ballcock) with a plastic or metal nut.
- Valve side (shutoff): Typically 3/8” compression.
Most kitchen/bathroom faucets use 3/8” compression at the shutoff, 1/2” at the faucet. Most toilets use 3/8” compression at the shutoff, 7/8” at the toilet. If your shutoff has an odd fitting, bring the old line to the hardware store to match.
Tools & Materials
- New supply line (braided stainless, properly sized)
- Adjustable wrench
- Bucket
- Rag and paper towels
- Optional: plumber’s tape (usually not needed on modern compression fittings)
Step-by-Step: Replace the Supply Line
1. Shut Off the Local Valve
Turn the valve at the wall (behind the toilet, or under the sink) clockwise until it stops. Open the faucet or flush the toilet to verify water is off.
If the valve doesn’t fully shut off (common on old valves), you’ll need to shut off the main to the house first, then replace the valve too before proceeding (separate job).
2. Drain Residual Water
Open the faucet with both hot and cold handles on to drain the line. For a toilet, the tank is already empty (you flushed it).
3. Disconnect the Old Line
Put the bucket under the connections. Use the wrench to loosen the nut at the valve end first (counterclockwise). A small amount of water drips out.
Then loosen the nut at the faucet or toilet end. More water drips.
Remove the old line.
4. Inspect the Connections
Check the threads on the valve and the faucet/toilet. Any visible damage or corrosion should be cleaned with a wire brush. If the threads are stripped, replace the valve or faucet connection point.
5. Attach the New Line
Valve end first: Thread the new line’s nut onto the valve outlet. Hand-tight.
Faucet or toilet end: Thread the other end onto the faucet or toilet shank. Hand-tight.
Now with a wrench, tighten each end a quarter to half turn past hand-tight. Stop. Braided stainless lines seal with their internal rubber gaskets — they do not need to be cranked down.
6. Do NOT Use Plumber’s Tape on Supply Lines
Supply line connections use a rubber gasket or integrated seal inside the nut. Teflon tape is unnecessary and can actually prevent proper seating. Don’t use it here.
(Tape is for threaded pipe joints — metal-on-metal. Supply lines are metal-on-rubber.)
7. Turn Water Back On Slowly
Open the shutoff valve a quarter turn. Watch the connections. If there’s a slow weep, tighten another eighth turn with the wrench.
Fully open the valve. Let water flow for 30 seconds. No drips = done.
8. Double-Check Under the Sink or Behind the Toilet
After 10 minutes, check again with a paper towel. Touch every joint. Any moisture means tighten another eighth turn.
Common Mistakes
- Buying the wrong length. Too short and you can’t connect without stretching. Too long and the line kinks — kinked lines fail prematurely. Aim for 2–4 inches of slack.
- Overtightening. Crushes the rubber gasket. Hand-tight plus a quarter to half turn.
- Using plumber’s tape. Prevents the rubber gasket from seating. Skip it.
- Reusing old lines. Never. Once removed, they don’t re-seat reliably.
- Keeping plastic supply lines. They fail violently. Replace at sight.
Preventive Strategy for a Whole House
Every 10 years, replace all supply lines in the house at once. That’s typically 4–8 lines, $40–$80 in parts, and 1–2 hours of work. You’ll prevent what insurance data shows is one of the top home water damage causes.
Inventory:
- Every bathroom sink: 2 lines (hot + cold)
- Kitchen sink: 2 lines
- Every toilet: 1 line
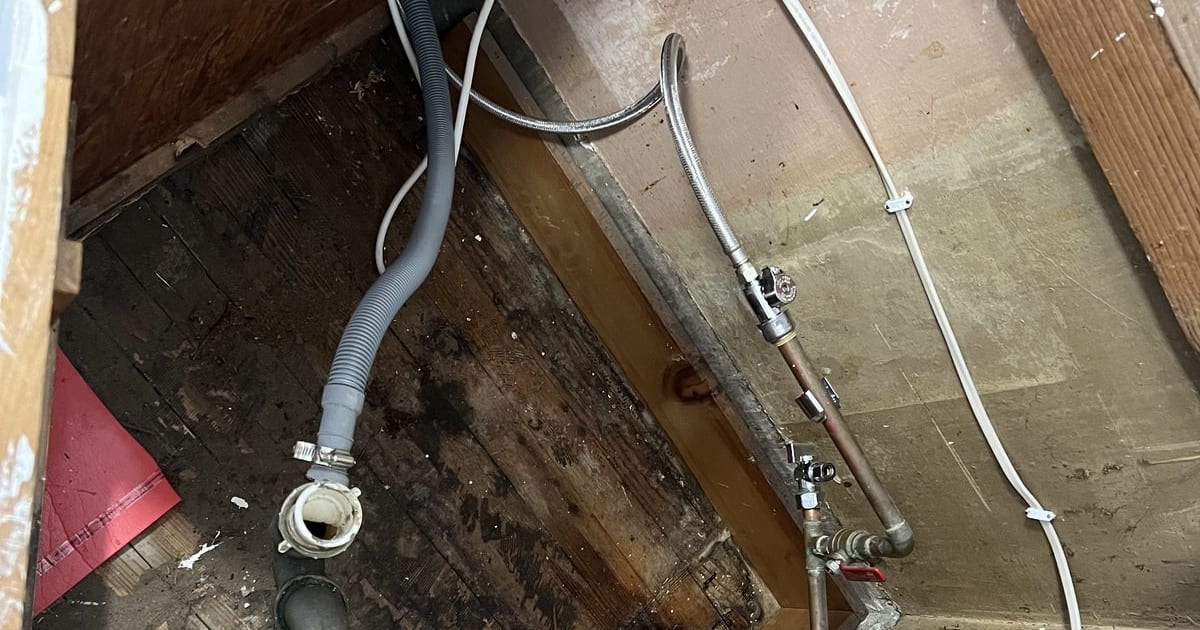
- Washing machine: 2 lines (hot + cold) — these are larger; use dedicated washing machine hoses
- Dishwasher: 1 line
- Refrigerator (if ice maker or water dispenser): 1 line — often plastic, replace immediately
The Washing Machine Hose Is the Riskiest
Washing machine supply hoses carry the highest water pressure over the longest continuous length and see daily high-flow use. They fail more often than any other supply line. If your washer hoses are rubber (not braided stainless), replace them today. And turn off the valves between loads if you can (or install auto-shutoff valves).
Frequently Asked Questions
Do I need to call a plumber to replace a supply line? No. This is the most beginner-friendly plumbing task in a house. One wrench, 15 minutes.
What’s the difference between 3/8” and 1/2” supply lines? The diameter of the end fitting. 3/8” compression is standard for most valves. The faucet side is often 1/2” IPS. Match your old line.
Should I replace the shutoff valve at the same time? If the valve is over 20 years old, hard to turn, or leaks when operated — yes. A new 1/4-turn ball valve is $8 and lasts decades. Otherwise, no.
Why did my old plastic supply line fail? Plastic polymer lines (including some “poly-braid” types) degrade over time from chlorinated water exposure. Many were made in the early 2000s and have now failed in the field. Manufacturers have issued 5-year replacement recommendations for several models. Braided stainless is the current safe standard.
How tight is “tight enough”? Hand-tight plus a quarter to half turn. If you’re straining with a wrench, you’re probably overtightening. Modern supply lines are designed to seal with light compression on the rubber gasket.
The Bottom Line
A supply line failure floods a room in minutes and costs thousands to remediate. A proactive replacement is $10 and 15 minutes. If you have any plastic lines, or lines over 10 years old, schedule an hour this weekend and replace them all — you won’t regret it.
If you’re planning a kitchen or bathroom remodel and want a plumbing inventory, fixture plan, and permit checklist tailored to your project, send your photos for a $9.99 diagnostic report.