Installing a new toilet is a 90-minute DIY job for a confident homeowner, with a helper. Parts cost $150–$450 depending on the toilet. The job is almost entirely mechanical — no soldering, no electrical work, no cutting pipe. It’s the flange setup and the wax ring seat that matter; everything else is bolts and hand-tightening.
Here’s the full install, including the three flange conditions that determine which wax ring to buy.
Pick the Right Toilet
Rough-in distance: Measure from the wall behind the toilet to the center of the bolt caps on the existing toilet floor. Standard is 12 inches. Older homes may have 10” or 14” rough-ins — buy a toilet that matches.
Height:
- Standard (15”): Traditional height, cheaper, better for shorter users.
- Comfort height (17”): Easier on knees; ADA-style. Preferred by most adults and required by code for accessible bathrooms.
One piece vs. two piece:
- Two-piece: Tank and bowl separate. Cheaper ($150–$250), easier to install alone, easier to replace parts later.
- One-piece: Cleaner look, easier to clean, more expensive ($350–$600), heavier (100+ lbs).
Flush system:
- Gravity-fed: Traditional, quiet, reliable. Go with 1.28 GPF models for water efficiency.
- Pressure-assisted: Powerful flush, louder, more expensive. Rare in residential now.
Good brands: TOTO (premium), Kohler, American Standard. Mid-range ($200–$350) gets you a quiet, efficient, well-designed toilet that lasts 20+ years.
Tools & Materials
- New toilet (bowl, tank, seat, bolts — verify all parts included)
- Wax ring (chosen based on flange condition — see below)
- Two closet bolts with washers and caps (usually included in new toilet kits)
- Braided stainless supply line (don’t reuse the old one)
- Adjustable wrench
- Hacksaw or bolt cutter (for trimming closet bolts)
- Putty knife
- Sponge and bucket
- Rags, rubber gloves
- Level (a torpedo level works)
- Plastic shims (for leveling on uneven floors)
- Silicone caulk (bath/kitchen grade, white or clear)
- A helper
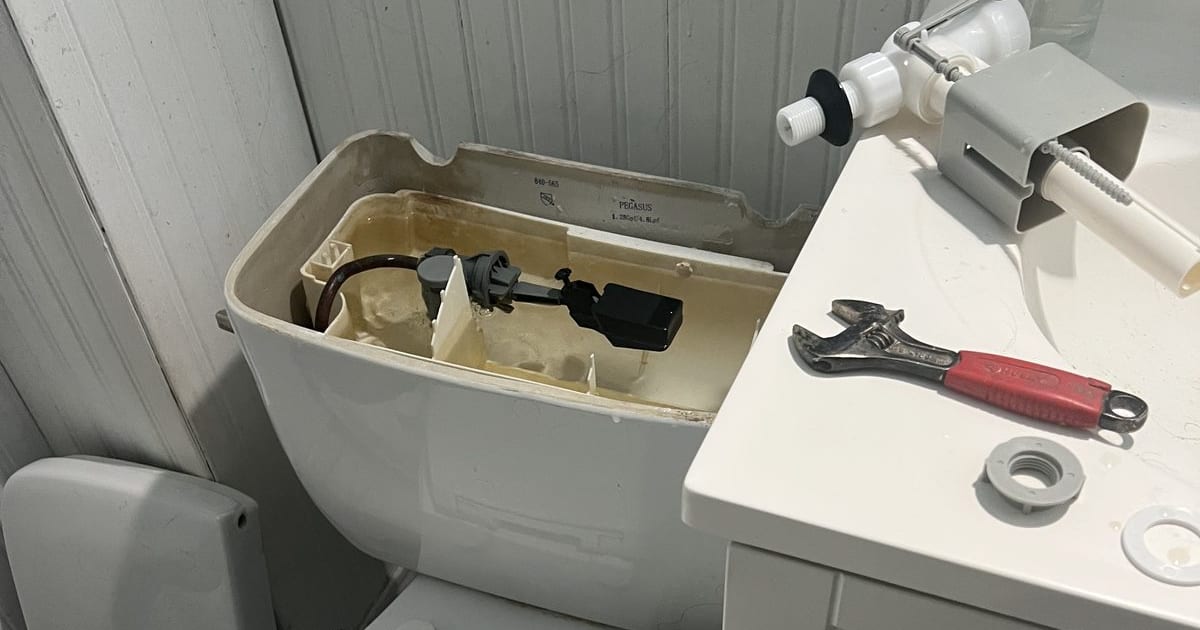
Before You Buy the Wax Ring: Inspect the Flange
The closet flange is the round fitting on the floor that the toilet sits on. Three conditions determine your wax ring:
- Flange is at or slightly above the finished floor (ideal). Use a standard wax ring ($4).
- Flange is below the finished floor (common after new tile/flooring). Use an extra-thick or double-thick wax ring, or add a flange extender ring first. Otherwise the ring will always fail.
- Flange is damaged, cracked, or missing bolt slots. Install a flange repair ring, flange extender, or replace the flange before proceeding.
My preference: Fluidmaster 7530 or Korky 6000. These are rubber/foam reinforced wax-alternative rings that work on a wider range of flange conditions and don’t deform if you have to pull the toilet later. A few dollars more, much more forgiving.
Step-by-Step: Install the Toilet
1. Remove the Old Toilet (if applicable)
See our “how to replace a toilet wax ring” guide for the removal procedure. Key steps: shut off water, drain tank and bowl, disconnect supply, unscrew bolt nuts, rock and lift.
2. Clean the Flange
Scrape off all old wax with a putty knife. Plug the drain opening with a rag to block sewer gas.
3. Inspect and Repair the Flange if Needed
- Damaged flange: Install a spanner/repair ring — screws into the subfloor and provides new bolt slots.
- Flange below floor level: Install a flange extender — a plastic ring that raises the flange flush with the floor. Screws down through the existing flange.
4. Install New Closet Bolts
Slide two new closet bolts into the flange slots, at 3 and 9 o’clock (left and right). Use the plastic retainers to keep them vertical.
5. Assemble the Tank to the Bowl (Two-Piece Toilets Only)
Some toilets ship with tank pre-attached. If not:
- Install the tank-to-bowl gasket (rubber ring) on the underside of the tank where it meets the bowl.
- Insert the two or three tank-mounting bolts through the holes inside the tank, with rubber washers inside the tank and metal washers/nuts below.
- Lower the tank onto the bowl, aligning bolts with holes.
- From below the bowl (the flat surface at the back), hand-tighten the nuts, then a quarter turn with a wrench.
- Do not overtighten — porcelain cracks. Just enough to seat the gasket.
6. Install the Wax Ring
On the bottom of the bowl method (my preference):
- Flip the bowl gently on its side onto a towel.
- Press the wax ring onto the bowl’s underside, centered around the horn (the protruding drain opening).
- Warm the wax with your hands first if cold — helps it adhere.
On the flange method:
- Press the ring directly onto the flange, centered.
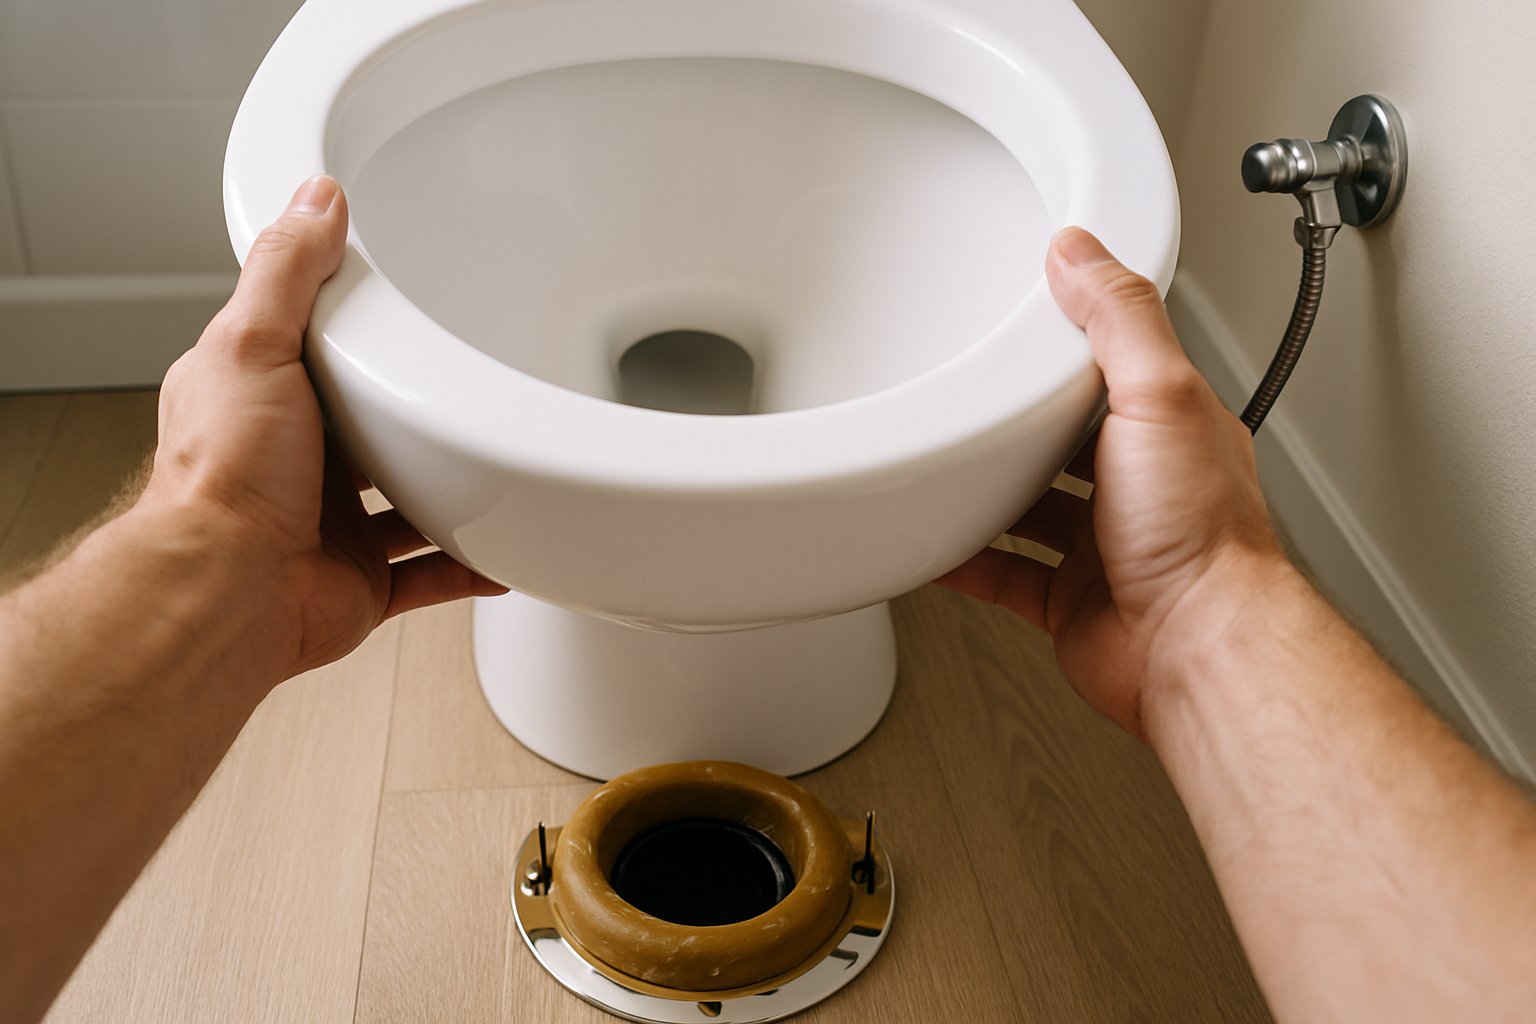
7. Set the Bowl
Remove the rag from the drain. With your helper, lift the bowl over the flange bolts. Lower straight down — do not tilt or rock.
Align the two bolt holes in the bowl’s base with the bolts sticking up from the flange.
Once the bowl is resting on the wax ring, press down firmly and evenly with your body weight to compress the wax. Do not rock — rocking breaks the seal.
8. Level the Bowl
Use a torpedo level on the bowl’s top rim, checking side-to-side and front-to-back. If the bowl isn’t level, slide plastic shims under the base at the low points. You’ll caulk over them later.
9. Tighten the Closet Bolts
Thread the washers and nuts onto the bolts. Alternate tightening, a quarter turn each side, to compress the wax evenly. Hand-tight plus a quarter turn with a wrench.
Do not overtighten. If you feel significant resistance, stop.
10. Trim the Bolts
Use the hacksaw or bolt cutter to trim the bolts to the right length (about 1/4” above the nut). Snap on the decorative caps.
11. Install the Seat (Two-Piece Toilets)
Bolt the seat onto the bowl via the two holes at the back rim. Adjustment tabs or mounting posts vary by toilet.
12. Connect the Supply Line
Attach a new braided stainless supply line:
- Valve end: hand-tight plus a quarter turn
- Tank end: hand-tight plus a quarter turn
Don’t use Teflon tape. Supply lines seal with internal rubber gaskets.
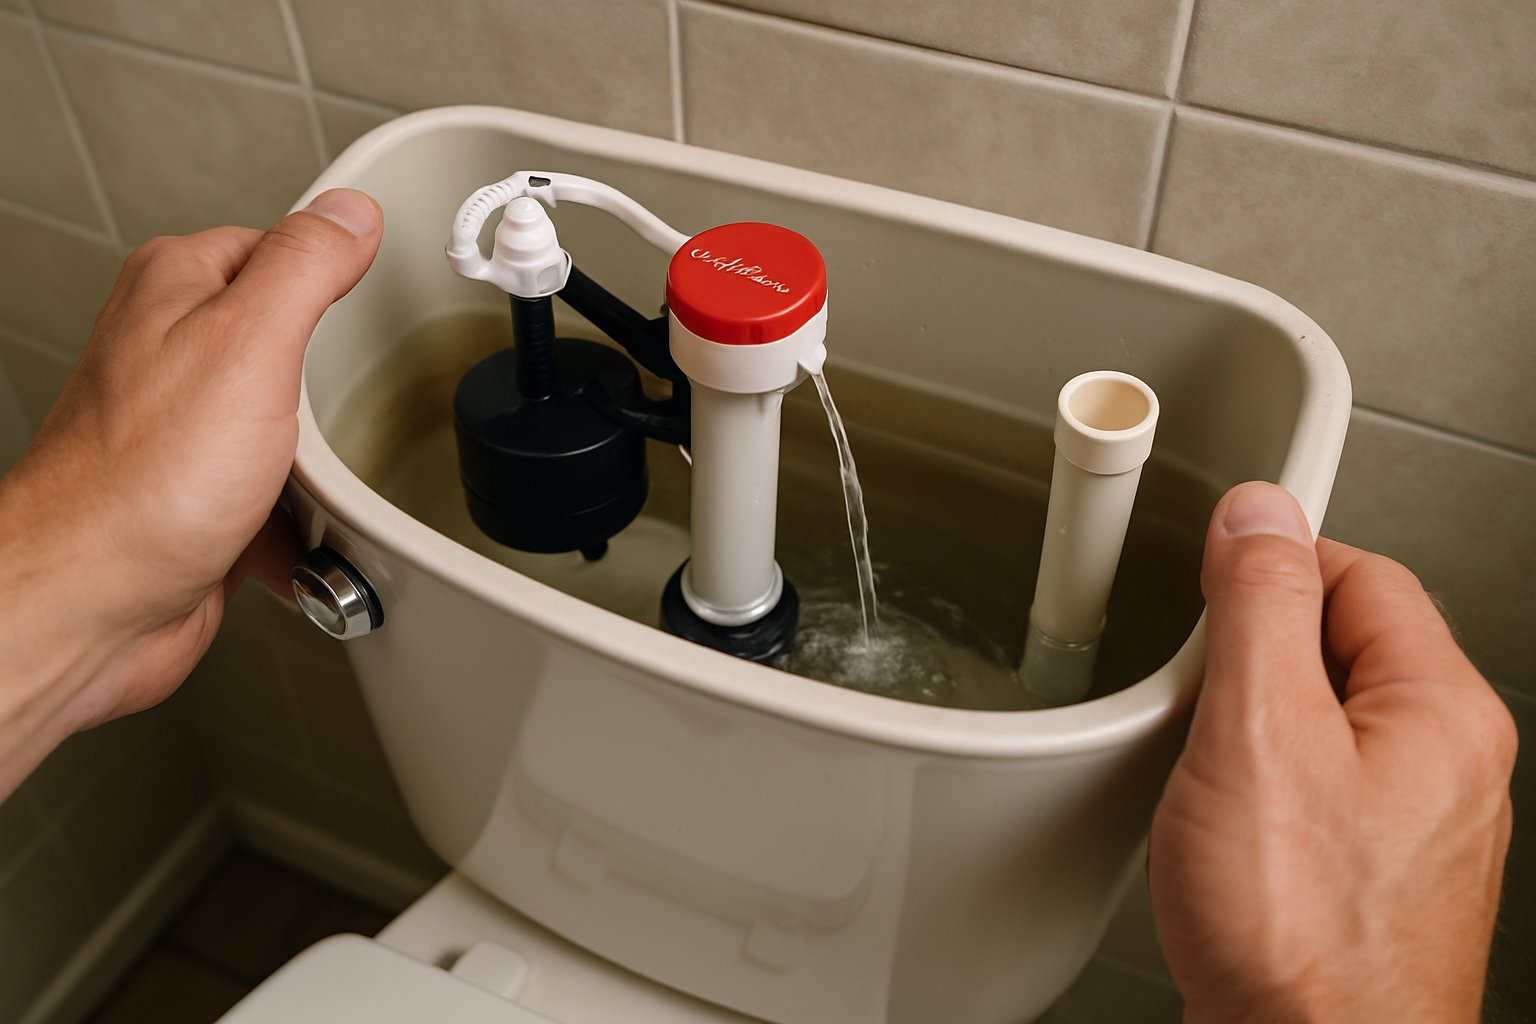
13. Turn Water On and Flush
Open the shutoff valve slowly. Let the tank fill. Check for:
- Leaks at the supply line connections
- Leaks around the tank-to-bowl gasket
- Leaks at the base of the toilet
Flush several times. Watch the base for water.
14. Caulk the Base
After a few days (to confirm no leaks), caulk around the base of the toilet with silicone. Leave a 1-inch gap at the back — NJ code often requires this so a future leak becomes visible rather than hidden under a sealed base.
Common Mistakes
- Skipping the flange inspection. A recessed or broken flange means the wax ring fails — guaranteed. Assess and fix first.
- Rocking the toilet after setting it. Breaks the wax seal instantly. Set straight down, once.
- Overtightening the bowl bolts. Cracked porcelain. Expensive.
- Reusing the old supply line. Cheap to replace; catastrophic if it fails. Always new.
- Forgetting to trim the bolts before snapping caps. Caps won’t fit.
- Tightening tank-to-bowl nuts too much. Cracked tank. Snug, not tight.
NJ Permit Note
For a like-for-like toilet replacement in the same location using existing plumbing, no permit is typically required in NJ. If you’re relocating the toilet, adding one where none existed, or modifying drain/vent lines, a plumbing permit is required. Check with your local building department.
Frequently Asked Questions
How do I know my rough-in before buying? Measure from the wall behind the toilet to the center of the flange bolts (or center of the bolt caps on the existing toilet). 12” is standard. If yours is 10” or 14”, buy a matching rough-in.
Can I install a toilet alone? Technically yes, but a helper cuts difficulty in half. Bowls are heavy and you need to lower straight down without tilting — much easier two-person.
How do I level a toilet on an uneven floor? Plastic shims under the base at the low points. Trim the shims flush with the base once leveled, then caulk around the whole base (leaving the rear 1” gap).
When should I caulk the base? After a few days of normal use to confirm no leaks. Caulking immediately hides any wax ring failure.
How long does a toilet install take? Experienced: 45–60 min. First time: 90–120 min. Budget the longer time and don’t rush.
The Bottom Line
A toilet install is ambitious DIY for a first-timer but completely achievable. The flange setup and the wax ring seat are the two critical moments; everything else is mechanical. Take your time, don’t skip the level check, and don’t overtighten anything.
If you’re planning a bathroom remodel and want a fixture plan, plumbing layout, and permit checklist tailored to your project, send your photos for a $9.99 diagnostic report.