Trim work separates a finished room from one that looks unfinished. Baseboard along the bottom of every wall, with shoe molding (the thin quarter-round at the very bottom) hiding the gap between baseboard and floor, is the standard treatment in any quality build.
The reason most amateur trim jobs look amateur: they assume walls are straight (they aren’t) and floors are level (they aren’t). Pros use specific techniques to hide the irregularities. Once you know them, baseboard installation is genuinely doable.
Here’s the full sequence I use.
Tools and Materials
- Miter saw (rented for $40/day if you don’t own one)
- Coping saw (a $15 hand saw with a thin blade)
- Brad nailer with 18-gauge nails (or pneumatic finish nailer)
- Caulk gun
- Tape measure
- Pencil
- Paintable caulk (white silicone-acrylic)
- Wood filler
- 220-grit sanding block
Materials:
- Baseboard (1×4 primed pine is standard, or pre-primed MDF for paint-grade)
- Shoe molding or quarter-round (small profile — 5/8” or 3/4” works for most rooms)
- 2-inch 18-gauge brad nails (for baseboard into studs)
- 1.25-inch 18-gauge brad nails (for shoe molding into baseboard)
Step 1: Prep Walls and Plan Layout
Remove existing baseboard if replacing. Run a putty knife between the baseboard and wall to break the caulk seal, then pry gently with a pry bar. Pull nails through the back of the baseboard to avoid splintering the face.
Patch any holes or damage in the wall. Sand smooth.
Identify wall studs. A stud finder marks where you’ll nail. Most rooms have studs every 16 inches.
Plan your cuts to minimize seams. For walls longer than your baseboard length, plan the seam at a stud — that gives you a solid nailing target on both pieces.
Measure each wall. Note the lengths. Account for inside corners (where two walls meet inward) and outside corners (where walls meet outward).
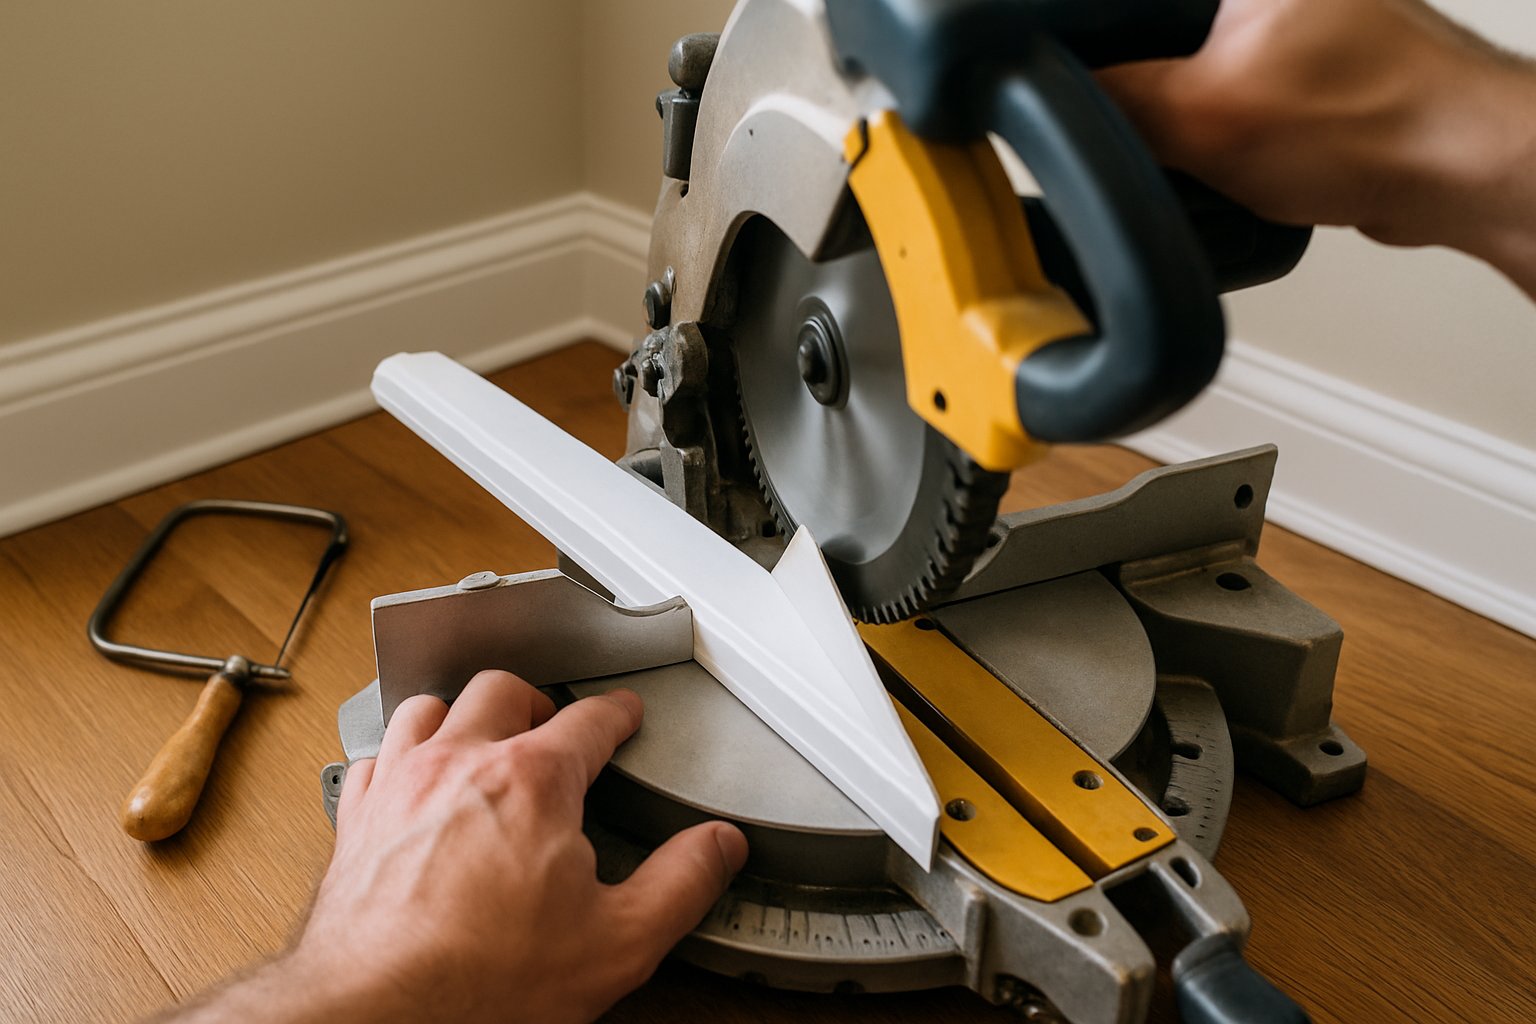
Step 2: The Inside Corner Technique (Coping)
Inside corners are the hardest part. The amateur approach is to miter both pieces at 45 degrees and butt them together. This works on perfectly square walls — which don’t exist. The professional approach is “coping.”
Coping the inside corner:
- Cut the FIRST piece square (90 degrees) where it meets the wall in the corner.
- Push it firmly into the corner. The square cut sits flush against the adjacent wall.
- The SECOND piece (the one that runs into this corner) gets coped:
- Cut it at a 45-degree miter as if for an inside corner.
- The miter cut creates a profile (the curved face of the baseboard now visible at the cut edge).
- Use a coping saw to follow that profile EXACTLY, cutting away the wood behind it at a slight back-angle.
- The result is a piece whose end matches the profile of the first piece’s face.
- The second piece’s coped end fits over the first piece’s face. Any gap due to walls being out-of-square is hidden because the cope conforms to the actual contour.
This sounds harder than it is. Watch a YouTube video first if you’ve never coped — once you’ve done two of them, it clicks. The result is dramatically better than mitered corners.
Step 3: Outside Corners (Mitered)
Outside corners are simpler — both pieces miter at 45 degrees and meet at a point.
- Hold a square against the corner. If it’s perfectly 90 degrees, miter both pieces at 45.
- If the corner is slightly off (most are), use an angle gauge to measure the actual angle. Adjust your miter accordingly — e.g., for a 92-degree corner, miter each piece at 46.
- Test-fit before nailing.
- Once tight, nail and apply a small bead of glue to the joint.
Step 4: Long Walls (Scarf Joint for Seams)
For walls longer than your baseboard, two pieces meet in the middle of the wall.
Don’t butt them together — use a scarf joint:
- Cut the end of one piece at a 30-45 degree angle.
- Cut the matching end of the second piece at the inverse angle.
- The two angled cuts overlap, hiding the seam from view at most angles.
Scarf joints are nearly invisible after caulk and paint. Square-cut butt joints stand out forever.
Step 5: Nail It Up
- Hold the baseboard against the wall, pushing it tight to the floor (or to your spacer if intentional gap).
- Use a stud finder to identify each stud.
- Drive 2 brad nails per stud — one near the top of the baseboard, one near the bottom. Angle slightly so nails grip multiple stud fibers.
- At seams, drive nails into both pieces at the seam location to prevent shifting.
- Don’t drive nails flush — leave them a fraction recessed for filling.
Walls that aren’t straight: push the baseboard tight to the wall at each stud. Small gaps between studs will hide with caulk later.
Step 6: Install Shoe Molding (Quarter-Round)
The shoe is the smaller profile that runs along the bottom of the baseboard, covering the gap between baseboard and floor.
- Cut shoe pieces using the same coping technique for inside corners and miters for outside corners.
- Nail the shoe to the BASEBOARD (not to the floor) using 1.25-inch brads.
- Drive nails at a slight downward angle so they grip the baseboard, not the floor.
The shoe gives you forgiveness — it hides irregular floor heights, gaps caused by floor refinishing, and the subtle slope of an out-of-level floor.
Step 7: Fill, Caulk, Paint
Fill nail holes with wood filler. Sand smooth when dry.
Caulk every seam:
- Where baseboard meets wall (top of the baseboard)
- Where baseboard meets shoe molding (top of shoe)
- At every miter joint
- At seams between baseboard pieces
Use white paintable silicone-acrylic caulk. Apply a tiny bead, smooth with a wet finger, wipe excess immediately.
Paint the baseboard and shoe molding with semi-gloss latex.
Common Mistakes
- Mitering inside corners instead of coping. Mitered insides gap as walls move slightly with seasonal humidity. Coped joints stay tight.
- Nailing shoe molding to the floor. Shoe should attach to the baseboard. Nailing to the floor causes the shoe to crack when the floor moves.
- Not back-cutting the cope. Just following the profile straight-on doesn’t allow the cope to fit tight. Always back-cut at a slight angle (the back of the cut should be slightly behind the front).
- Leaving large gaps unfilled. Caulk hides gaps under 1/8 inch beautifully. Larger gaps need wood filler in the gap, then caulk over.
- Painting before caulking. Paint over uncaulked baseboard shows every wall imperfection. Always caulk first.
When to Hire It Out
- Whole-house baseboard installation in a high-end home with stained (not painted) trim — the precision required for stain-grade work is a different level
- Curved walls or unusual profiles
- Crown molding (more complex; same principles but trickier angles)
The Bottom Line
Baseboard and shoe molding turn a room from drywall-and-paint to “finished.” The investment is one weekend per room. The technique that separates pro work from DIY is coping inside corners and using scarf joints for long-wall seams. Walls and floors aren’t straight — the trim hides that fact.
For the full sequence including stained trim, complex profiles, and the multi-room layout planning, see Install Baseboard and Shoe Molding.
For a whole-room or whole-house trim plan, send your photos for a $9.99 diagnostic report.