The reason most amateur paint jobs look amateur is not the paint, the brushes, or the prep. It’s the order of operations and a single technique error that shows up as visible roller lines, lap marks, and a slightly different sheen wherever the brush met the roller. Pros work in a specific sequence and never violate a few rules. Once you know them, a one-coat finish on a normal wall is genuinely achievable.
Here’s the full sequence I use on my own walls.
Buy Premium Paint, Period
This is the one place where the cheap option costs more in the end. Premium paint (Sherwin-Williams Emerald, Benjamin Moore Aura or Regal Select, Behr Marquee) has more pigment and more solids, so it covers in one coat where economy paint needs two. The hour you save on a second coat — plus the labor of moving furniture twice — pays for the upgrade many times over.
For walls in a normal room: matte or eggshell finish. For trim and doors: semi-gloss. For bathrooms and kitchens: eggshell or satin (resists moisture without being too shiny).
A gallon covers about 350 square feet — one coat. A 12-by-12 room with 8-foot ceilings, two coats? Two gallons. Don’t run out mid-wall.
Tools That Actually Matter
- 9-inch roller frame with a 3/8-inch nap microfiber cover (smooth walls) or 1/2-inch nap (textured)
- A real cut-in brush — Purdy XL Glide 2-inch angled sash. $15 and lasts a decade if you wash it after each use. The dollar-store brushes are a false economy; they leave brush marks no premium paint can hide.
- A roller tray with a liner (or a 5-gallon bucket with a Wooster Pelican grid for bigger jobs)
- Painter’s tape (FrogTape Multi-Surface — yellow box) for crisp edges
- A 12-foot drop cloth (canvas, not plastic — plastic is slippery and the paint pools on it)
- A ladder tall enough to reach the ceiling line standing comfortably
Prep Is Most of the Job
- Move furniture out of the room if at all possible. Anything that can’t move goes to the center of the room, covered with a drop cloth.
- Take down curtains, switch plates, outlet covers, and anything else you can. Loose hardware in a baggie taped to the wall keeps it organized.
- Wash the walls with a damp microfiber cloth — kitchens get a wipe with a degreaser, bedrooms just dust. Paint doesn’t bond to grease.
- Patch any holes or cracks (separate post on that).
- Sand patched areas with 220-grit and prime them. Without primer, patches show through as duller spots called “flashing.”
- Tape the trim, ceiling line, and any adjacent walls you’re not painting. Press the tape edge down hard with a putty knife so paint doesn’t seep underneath.
- Lay drop cloths.
The Order: Ceiling First, Trim Second, Walls Third
This is the order pros work in, and it matters:
- Ceiling first. If you splatter the wall doing the ceiling, the wall paint covers it. If you splatter the ceiling doing the wall, you have to repaint the ceiling.
- Trim second (baseboard, doors, window casings, crown molding if any). It’s faster to cut a wall edge against trim than the other way around — and any drips on the wall get covered when you paint the wall.
- Walls last.
If you’re not painting the ceiling or trim at all, you start with the walls — but always cut in around trim and ceiling first, because the walls are about cutting in clean and rolling fast.
Cutting In: The Step That Defines the Finish
Cutting in is using a brush to paint a 2 to 3-inch band along the corners, ceiling line, baseboard, and around windows and doors — anywhere a roller can’t reach without smearing the adjacent surface.
The technique:
- Load the brush by dipping it about 1/3 of the bristle length into the paint, then tap each side of the brush against the inside of the can to remove excess (don’t drag it across the can rim — that strips the paint off).
- Hold the brush like a pencil, not a fist.
- Make the first stroke about 2 inches away from the edge — apply paint to the wall, not directly along the line.
- Then, with a lighter touch, drag the loaded paint up to the line in a single smooth pass. The brush angle keeps the bristle tip on the line; the body of the brush spreads the paint into the wall.
- Cut in the entire perimeter of the room first — top, bottom, corners, around windows.
Critical rule: don’t let the cut-in dry before you roll the wall. If the cut-in dries, the brush-painted band shows up as a slightly different sheen than the rolled paint, and there’s no fix except repainting the whole wall. Cut in one wall, immediately roll that wall, then cut in the next.
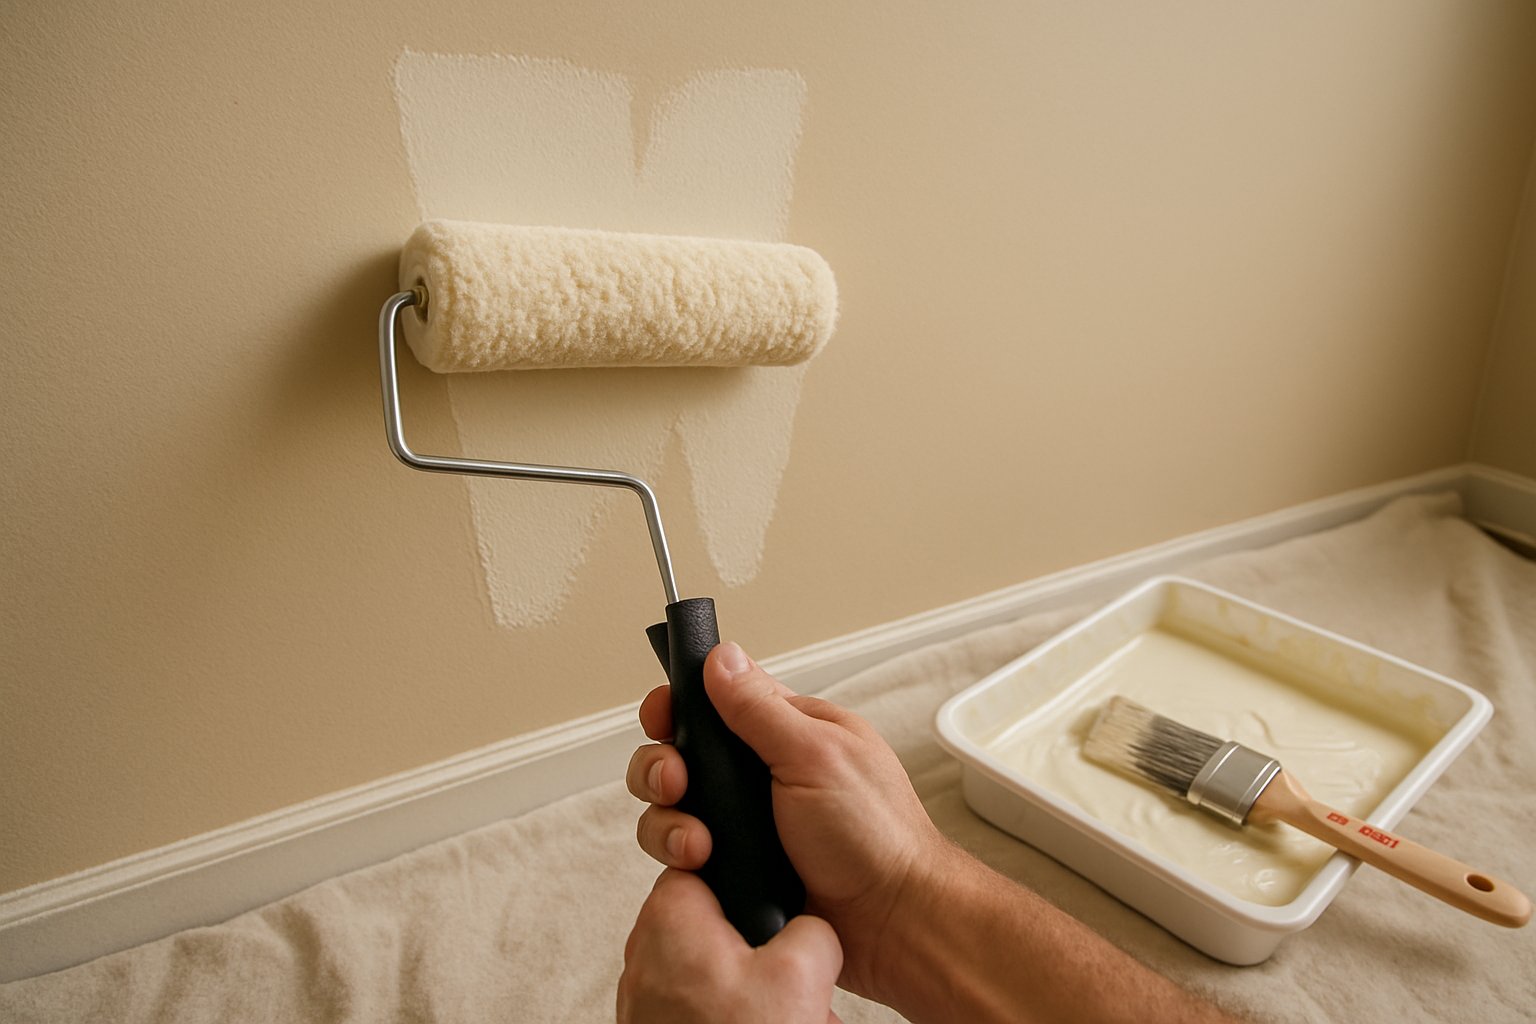
Rolling: The W Method
- Load the roller from the tray. Roll it back and forth in the deep end of the tray, then roll it up onto the dry slope to spread the paint evenly across the nap. The roller should be loaded heavily but not dripping.
- Start about 18 inches in from a corner. Roll a large W onto the wall — about 3 feet wide and 3 feet tall.
- Without reloading, roll back over the W in vertical strokes to fill in all the gaps and even out the paint.
- Finish each section with light, slow vertical strokes from top to bottom — these are the strokes that leave the final texture, and they need to be unhurried.
- Move to the next section. Always start the next section in the wet edge of the previous one — never let a section dry before you blend the next into it. This is what eliminates lap marks.
- Work from one corner of the room to the other, always maintaining the wet edge.
Common Mistakes
- Stopping in the middle of a wall. Once you start a wall, finish it before you take a break. Half-painted walls dry at different rates and the line shows.
- Rolling too fast. A roller flung across the wall throws fine paint mist back at you and leaves a stippled finish. Roll slowly, let the nap do the work.
- Reloading the roller without spreading paint first. A dry roller dragged on the wall leaves visible streaks. Always work the loaded paint out into the wall with the W and back-roll BEFORE reloading.
- Painting over wet cut-in with the roller. The cut-in needs to be wet, not dripping. If your brush band is glistening, give it 30 seconds before rolling into it.
- Removing tape after the paint is fully dry. Pull tape while the paint is still slightly tacky (typically 30–60 minutes after the final coat). Fully dried paint can pull off in strips along with the tape.
- Cheap roller covers. Foam covers leave bubbles. Synthetic covers shed lint. Buy microfiber.
When to Hire It Out
- The whole house, especially with high ceilings or stairwells. Pros are 4× faster and the cost-per-room drops because they’re already there. Less productive for a single-room job.
- Lead paint (any house painted before 1978) — testing first, then containment per EPA rules. Worth a pro.
- Cabinets and built-ins — these need spray application or an extremely particular brush technique to look right.
- Ceilings in a popcorn-textured room (the texture absorbs paint unevenly and almost always needs two coats).
Frequently Asked Questions
Do I really need to prime? Over fresh drywall or a patched wall — yes. Over a clean wall in good condition that’s been previously painted with a similar color and finish — no, premium paint will cover in one coat. Going light over dark, or dark over light? Prime, or expect three coats of finish paint.
How long between coats? Most modern latex paints recoat in 2 to 4 hours. Read the can — some are faster, and you don’t want to recoat too soon.
Can I store the roller in the fridge between coats? Yes. Wrap it tightly in a plastic grocery bag, push the air out, and put it in the fridge. It’ll be usable the next day. Don’t try to keep it more than 24 hours that way.
What’s the right way to clean a brush? Latex paint: warm water and a drop of dish soap, work the bristles between your fingers until the water runs clean. Never let paint dry in the bristles. Reshape the bristles and let dry flat.
Why does my paint roll fine on one wall and look streaky on another? Almost always the lighting. A wall that gets raking light (light coming in nearly parallel to the surface) shows every imperfection. Roll those walls with extra care, with longer final-pass strokes, and consider one extra coat.
The Bottom Line
Paint quality + tool quality + cutting-in-then-rolling-while-wet — three things, in that order. Get them right and the room looks pro on a single coat. Skip any of them and the room looks fine until the sun hits it from a low angle, and then it looks DIY forever.
For the full sequence — from the trim sand-and-prime to the cabinet repaint to the ceiling roller technique — see Paint a Room the Right Way.
Want a paint plan for a whole-house refresh — color sequencing, product picks, room order? Send your photos for a $9.99 diagnostic report.