Replacing a shower head takes 10 minutes, one adjustable wrench, and a roll of plumber’s tape. It’s the single easiest plumbing upgrade you can make, and a good shower head transforms the feel of a bathroom.
Here’s how to pick one, remove the old head without damaging the arm, and install the new one so it doesn’t drip at the threads.
Picking a Shower Head
Three things matter:
Flow rate. Federal max is 2.5 GPM. Modern low-flow heads (1.75–2.0 GPM) save water and still feel strong if well designed. Avoid anything over 2.5 GPM unless you plan to replace it before sale — newer buyers will notice in NJ.
Spray pattern. Rain heads (overhead, drenching), multi-spray (massage/mist/standard with a dial), handheld (detachable on a hose), and combo. For resale and livability, a combo rain + handheld is almost always the right pick.
Finish. Match your existing fixtures — polished chrome is the standard; brushed nickel, matte black, and brushed brass are all increasingly common.
Spend $50–$120 for a head that lasts 10+ years. Bargain heads ($15–$30) clog and rattle within 2 years. Speakman, Delta H2Okinetic, Moen, and Kohler are reliable mid-range brands.
Tools & Materials
- New shower head
- Adjustable wrench or channel-lock pliers
- Plumber’s tape (Teflon tape — white)
- Old rag or cloth
- Optional: penetrating oil (if the old head is seized)
Step-by-Step: Replace a Shower Head
1. Shut Off Water? (Usually Not Needed)
You don’t need to shut off water for a shower head swap. The water is only live when the shower is on. Just make sure the shower handle is off.
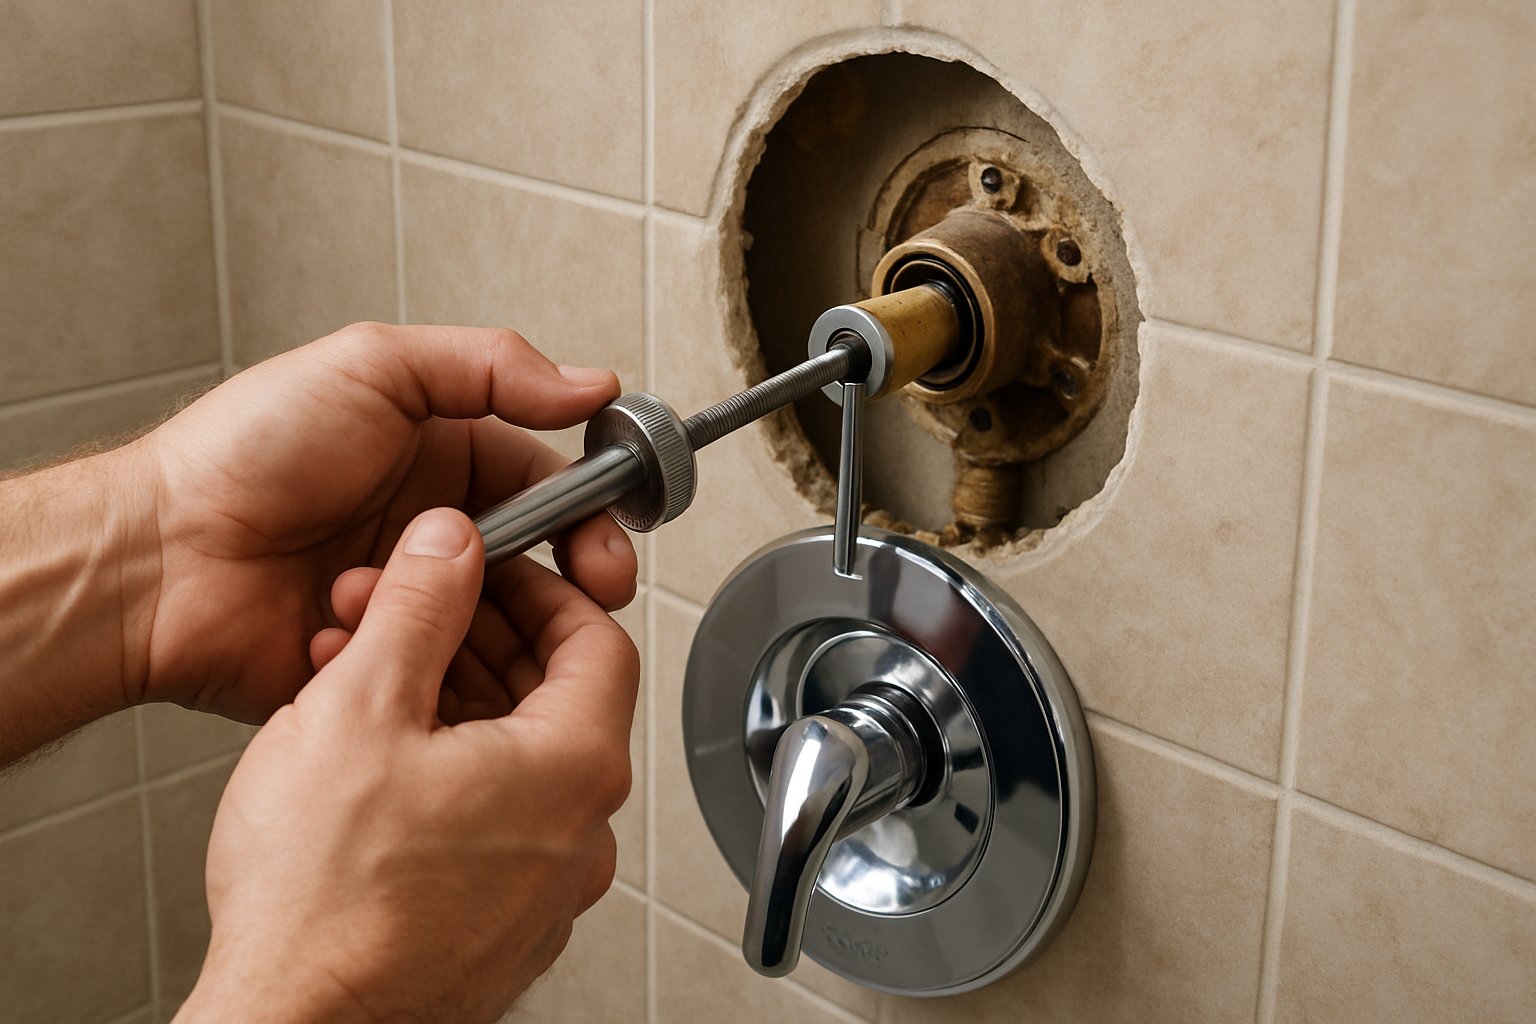
2. Remove the Old Shower Head
Wrap the shower arm (the bent pipe coming out of the wall) with a rag to protect its finish from wrench marks. Grip the arm with your hand to keep it from rotating inside the wall — a rotating arm can crack fittings in the wall cavity.
With the other hand, use an adjustable wrench on the collar of the shower head (the threaded nut part). Turn counterclockwise.
If it’s seized with mineral buildup:
- Spray penetrating oil on the threads and wait 10 minutes.
- Try again.
- If still stuck, wrap the threads in a rag soaked with white vinegar, leave for 1 hour.
- Try again.
- If it still won’t budge, you may need two wrenches (one on the arm to hold, one on the head to turn) — but be very careful not to twist the arm out of the wall.
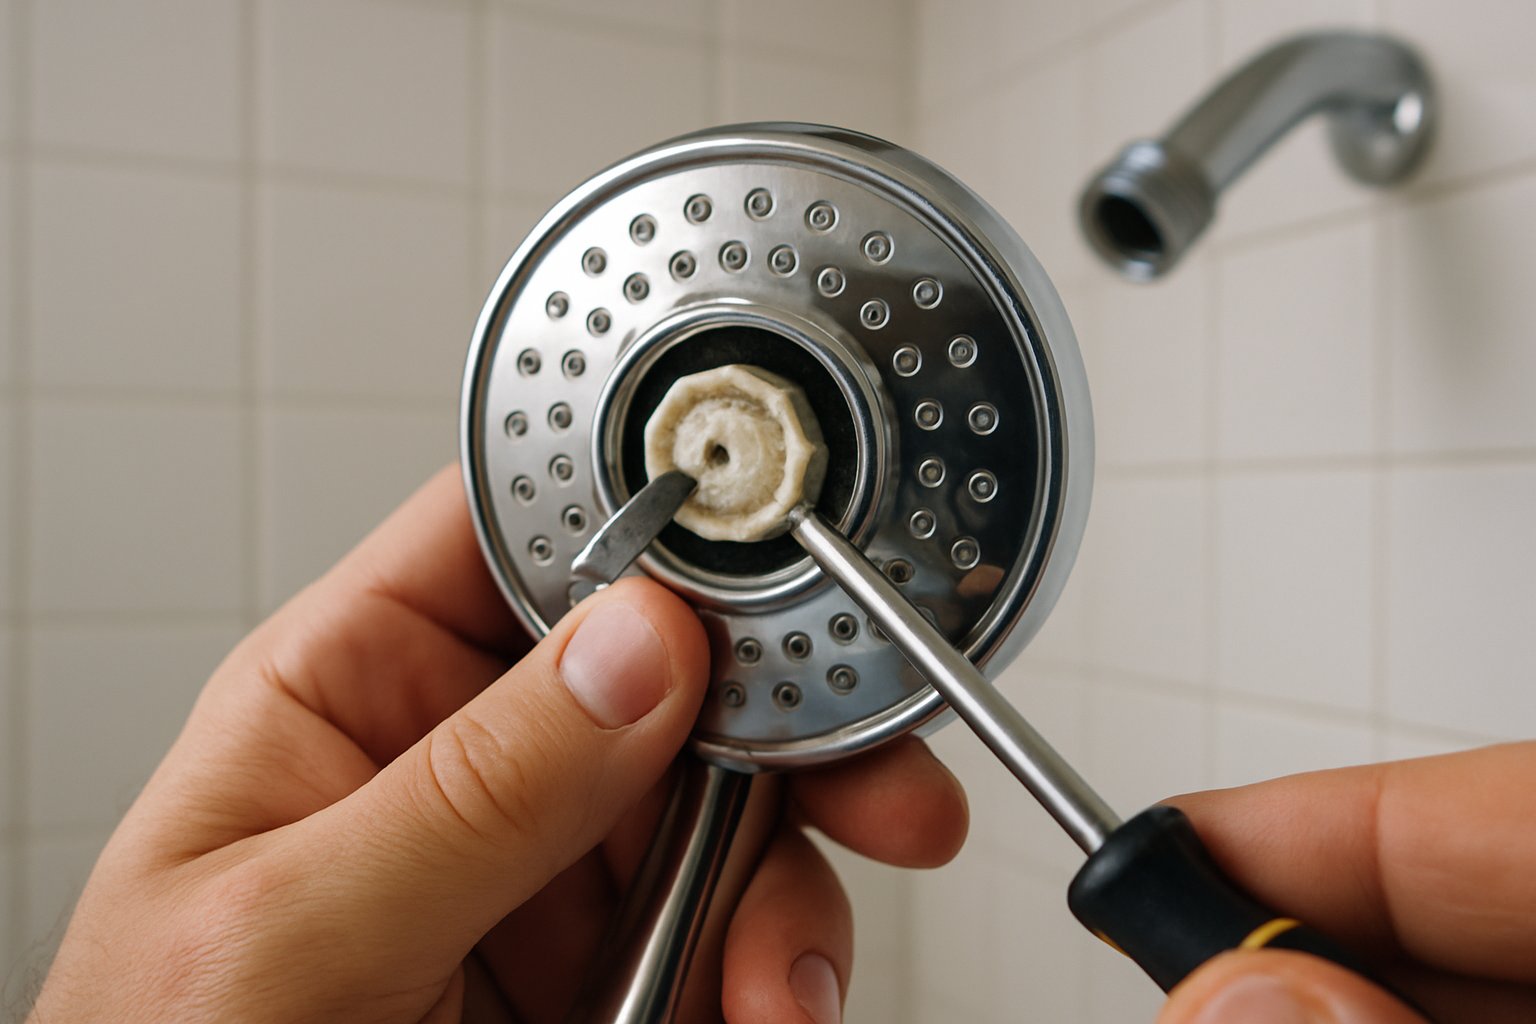
3. Clean the Threads
Wipe the threads on the shower arm clean. Remove any old plumber’s tape — peel it off completely. Old tape on new tape does not seal.
Check the threads for damage. If they’re stripped, the shower arm itself needs replacing (also a DIY — unscrew counterclockwise, install new arm with plumber’s tape, screw in clockwise).
4. Apply New Plumber’s Tape
This is the step most people skip or do wrong. Hold the roll so the tape wraps clockwise around the threads when you’re looking at the end of the arm. Wrap 2–3 times, pulling snug so the tape conforms to the threads. Tear the tape by pulling against the wrap direction.
If you wrap counterclockwise, the tape unwinds as you screw on the new head. It’s the single most common mistake.
5. Screw On the New Shower Head
Hand-tighten the new head onto the arm — clockwise. Get it as tight as you can by hand. Then give it a quarter to half turn with the wrench, using the rag to protect the finish.
Do not overtighten. You’ll crush the threads or crack the new head. Snug is enough.
6. Test
Turn the shower on. Watch the joint between the new head and the arm. If you see a drip — tighten another eighth turn. If you still see a drip, shut off, unscrew, check that the tape is still on and wrapped the right way, re-tape if needed.
Run the shower for 2 minutes and feel around the joint. Dry = success.
If You’re Installing a Handheld Shower Head
Handhelds have an extra step — the hose.
- Install a diverter or threaded connector at the shower arm (included with most handheld kits).
- Screw the hose to the diverter (plumber’s tape on the threads).
- Screw the handheld wand to the other end of the hose (plumber’s tape).
- Mount the holder bracket if the kit includes one — most stick to the tile with a silicone pad, no drilling needed on flat tile.
Common Mistakes
- Wrapping the tape the wrong direction. Clockwise when looking at the end of the arm. Otherwise the tape unwinds as you screw on the head.
- Too much tape. 2–3 wraps. Six wraps bunches up and prevents a good seal.
- Forgetting to hold the shower arm. A wrench on the head alone rotates the arm inside the wall, which can crack the elbow fitting behind the drywall — expensive repair.
- Overtightening the new head. Plastic-bodied heads crack. Snug, not muscle.
- Not cleaning old tape off the threads. Residue prevents the new tape from sealing.
Upgrading the Shower Arm Too
If your shower arm is old, discolored, or doesn’t match your new head finish — swap it. Standard NJ shower arms unscrew from the elbow inside the wall.
- Unscrew the arm counterclockwise while holding the elbow inside the wall with your other hand reaching up into the arm (awkward but doable).
- Clean threads on both the arm and the replacement.
- Apply plumber’s tape to the wall-side threads on the new arm (2–3 wraps clockwise).
- Screw in clockwise. Stop when the arm points straight down and the bend is vertical. If it stops before that position, remove and add one more wrap of tape. If it goes past, back off and add tape to set the final position.
- Apply tape to the other end, install the head.
Frequently Asked Questions
Do I need to shut off the water to replace a shower head? No. Just make sure the shower handle is off — there’s no pressure at the head when the shower isn’t running.
How do I know what size my shower arm thread is? All US residential shower arms use 1/2” NPT thread (industry standard). Any shower head sold at Home Depot/Lowe’s fits.
My old shower head is cemented with mineral buildup — how do I remove it? Vinegar soak (rag wrapped around the joint, 1 hour) or penetrating oil. If neither works, replace the arm too — cutting the head off the arm is faster than forcing it.
Why does my new shower head drip from the face when off? Either the shower valve cartridge is slow to shut off, or a drop of water is sitting in the arm — normal for a few seconds after shutoff. If it continues dripping for minutes, the shower valve cartridge needs replacing (not the head).
Can I install a rain head on an existing shower arm? Usually yes — rain heads screw onto a standard 1/2” NPT arm. For a true ceiling-mount rain head, you’d need to redo the plumbing inside the wall/ceiling to feed from above.
The Bottom Line
10 minutes, one wrench, a roll of plumber’s tape. The one thing to get right is wrapping the tape clockwise with the correct number of wraps (2–3, no more). If you do that, no leaks, no drama, bigger pressure, better feel every morning.
If you’re planning a bathroom remodel and want a fixture plan, plumbing layout, and permit checklist tailored to your project, send your photos for a $9.99 diagnostic report.