A worn outlet is one of the most common — and most quietly dangerous — things in a house. The plug falls out under the weight of a phone charger. There’s a dark scorch mark around one slot. The outlet is warm to the touch. Any of those means the receptacle has failed and is one bad day away from arcing inside the wall.
The fix is a $3 outlet, a screwdriver, and 20 minutes. The trick is doing the steps in the right order so you never touch a live wire.
I’ve replaced hundreds of these in my own houses. Here’s how.
When You Should Replace an Outlet
Any of these is a hard “yes”:
- Plug falls out — the gripping springs inside the outlet are worn. It’s not coming back, no matter how careful you are.
- Scorch marks or melted plastic anywhere around the slots — that’s evidence of arcing. Replace it today.
- Outlet is warm to the touch with anything plugged in — that’s heat from a bad internal connection. Today.
- Two-prong outlet in a room you actually use — these date to before grounded plugs were code. They’re not a fire hazard by themselves, but they limit what you can plug in safely.
- Outlet near water (kitchen counter, bathroom, garage, outdoor) that’s NOT a GFCI — code now requires GFCI in those locations.
If the outlet is just discolored from age but works fine, you don’t have to replace it. But it’s $3 and 20 minutes, so most of the time, you should.
Tools and Materials
- New outlet (15 amp standard, or 20 amp if the wires going into it are 12-gauge — see below)
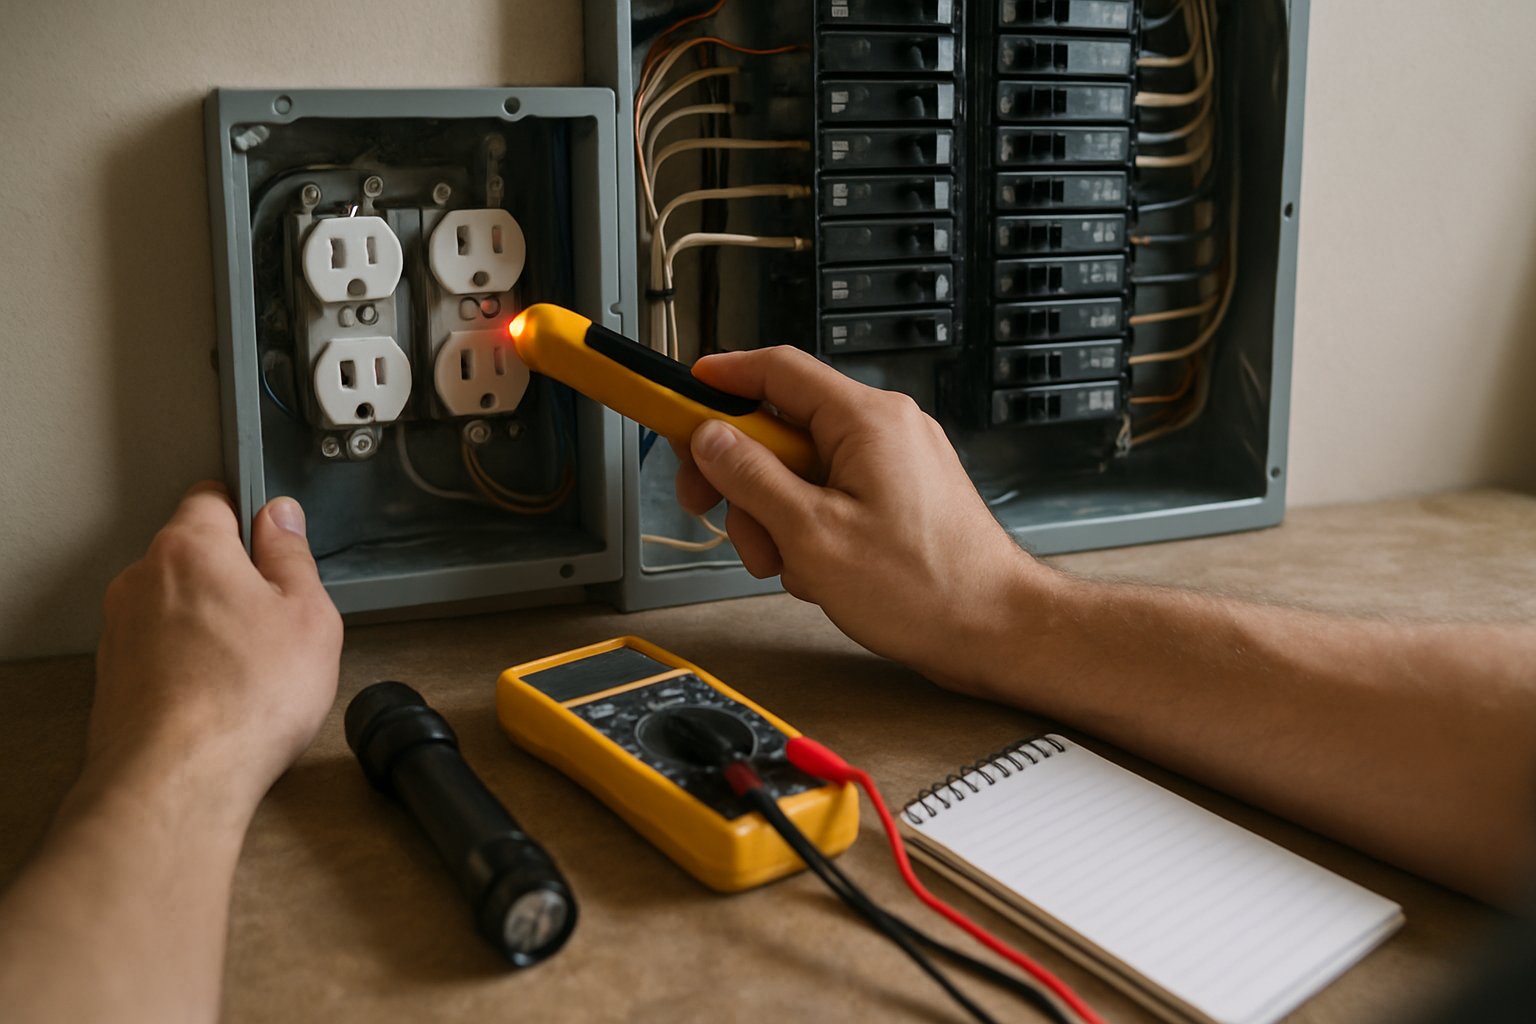
- A non-contact voltage tester (the pen-shaped tool, $10–$15 at any hardware store)
- A flathead and a Phillips screwdriver
- Maybe wire strippers if the existing wires are damaged at the ends
- A flashlight or headlamp
That’s it. You do not need a multimeter for a basic outlet swap. The voltage tester is non-negotiable.
The Safe Sequence (Do Not Skip Steps)
Step 1: Turn off the breaker. Find the panel, find the breaker that feeds the room with the outlet, and flip it off. If the panel isn’t labeled, plug a lamp into the outlet and have someone watch it while you flip breakers one at a time.
Step 2: Verify the outlet is dead. This is where people get hurt. The breaker label might be wrong. The wiring might be on a different circuit than you think. Hold the voltage tester against each slot of the outlet — top, bottom, and the round ground hole. The tester should stay silent and dark on every slot. If it beeps or lights up, the breaker you flipped wasn’t the right one. Stop, find the right one, and try again.
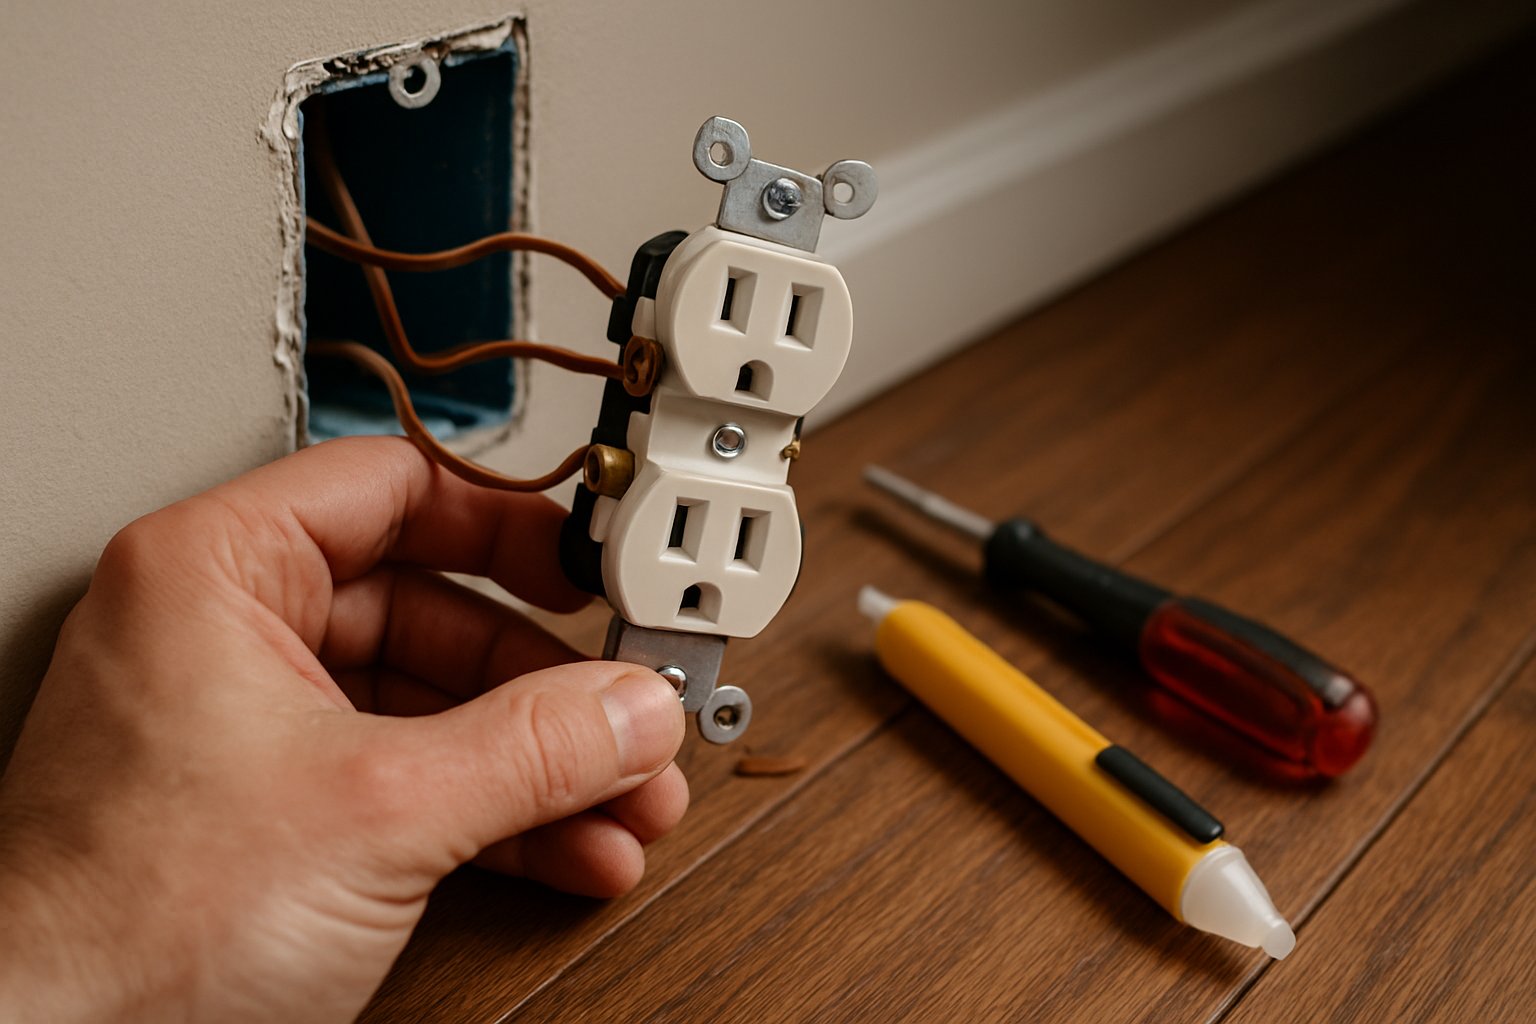
Step 3: Unscrew the cover plate. One screw in the middle.
Step 4: Unscrew the outlet from the box. Two screws — top and bottom. Pull the outlet out of the wall, but don’t disconnect any wires yet.
Step 5: Test the wires one more time. Touch the voltage tester to each wire screw on the side of the outlet, and to the ends of the wires themselves. Still nothing? Good. Now you can work.
Wiring the New Outlet
There are two ways to connect wires to a new outlet, and one is dramatically better than the other:
- Side screw terminals (the brass and silver screws on the sides) — this is the right way. The wire wraps around the screw and the screw clamps it down hard.
- Back-stab holes (the small holes in the back where you push wires in) — these were a 1980s shortcut. They loosen over time. They’re the leading cause of failed outlets. Don’t use them, even if the old outlet was wired this way.
Wire the new outlet like this:
- Black (hot) wire → brass screw on the right side. Bend the bare end into a hook with needle-nose pliers, hook it around the screw clockwise (so tightening pulls the loop closed, not open), tighten firmly.
- White (neutral) wire → silver screw on the left side. Same process.
- Bare or green (ground) wire → green screw at the bottom. Same process.
If your old outlet had wires back-stabbed, cut off any damaged or bent ends and strip fresh insulation back about 3/4 inch before bending the hooks.
Reinstall and Verify
- Push the outlet back into the box. The wires should fold accordion-style behind it — don’t cram them.
- Screw the outlet to the box with the two long screws.
- Reinstall the cover plate.
- Go back to the panel and flip the breaker on.
- Plug the voltage tester into the outlet. It should detect voltage now (touching the tester to the small slot — the hot side — should make it beep).
- Plug a lamp in. Confirm it works.
Done.
Common Mistakes
- Trusting the breaker label. Always test with the voltage tester after you flip the breaker. Every time.
- Using the back-stab holes. Even if the old wiring used them. Always use side screws.
- Wrapping the wire counterclockwise around the screw. Tightening then pushes the wire loop open. Always wrap clockwise.
- Forgetting the ground. Older houses sometimes don’t have a ground wire. Don’t fake one — leave the green screw alone, but understand that outlet won’t be a true grounded outlet, and you can’t legally plug a three-prong appliance into it. Add a GFCI instead, which is code-acceptable as a substitute.
- Replacing a 15-amp outlet with a 20-amp outlet on 14-gauge wire. The wire size has to match the outlet rating. If you’re not sure, count the strands — 14-gauge is the smaller, 12-gauge is noticeably thicker. When in doubt, install a 15-amp outlet.
When to Call an Electrician
- The wiring inside the box looks burnt, melted, or smells like ozone.
- You have aluminum wiring (silver-colored solid wire instead of copper). That’s a separate beast and needs aluminum-rated outlets installed by someone who knows the COPALUM crimping process.
- The outlet is in a kitchen or bathroom and there’s no GFCI anywhere in that circuit. Adding GFCI protection is a different job.
- More than two cables enter the box and you’re not sure which is the “line” (incoming) vs. “load” (outgoing). For a basic swap of an end-of-run outlet, you don’t need to know — but for a GFCI install, the difference matters.
Frequently Asked Questions
Do I need a permit to replace an outlet? In most municipalities, no — a like-for-like swap of a damaged receptacle is considered routine maintenance. Adding a new outlet (running new wire) does require a permit in nearly every town in NJ.
How do I know if my circuit is 15 or 20 amp? Look at the breaker that feeds it. If it says “15,” it’s a 15-amp circuit and the outlet should be 15 amp. If it says “20,” check the wire gauge — 12-gauge wire allows a 20-amp outlet, but 14-gauge requires a 15-amp outlet even on a 20-amp breaker (rare configuration; almost certainly was a mistake).
What’s the difference between a regular and a tamper-resistant outlet? Tamper-resistant (TR) outlets have spring-loaded shutters that block the slots unless something is inserted in both at the same time — to prevent kids from poking things in. Code requires TR outlets in all new installations in habitable rooms. They cost about $1 more. Always buy TR.
Why is my outlet warm even though nothing’s plugged in? That’s a serious sign of internal arcing. Turn off the breaker right now and replace it before anything else.
Can I replace an outlet that’s connected to a switch? Yes, but follow the wires carefully. If the outlet has a brass tab broken off between the two screws, don’t use a new outlet without breaking the same tab — that tab separation is what lets the switch control half the outlet (the lamp half) while the other half stays always-on.
The Bottom Line
A worn outlet is one of the highest-leverage DIY fixes in the house — three dollars in materials and 20 minutes of careful work removes a real fire risk from the wall. The single rule is: always test the wires with a voltage tester after you flip the breaker, before you touch anything. That one habit is what separates a routine job from a hospital visit.
Want the full sequence with the wiring diagrams, GFCI variants, and switch-controlled outlet diagrams? The complete walkthrough is in Replace an Outlet or Light Switch.
If you’ve got a project bigger than one outlet — a room rewire, a panel upgrade, or you just want a second opinion before you start — send your photos for a $9.99 diagnostic report.